Heading out the door? Read this article on the new Outside+ app available now on iOS devices for members! Download the app.
Practicing yoga at home isn’t always easy. It’s only human to go through phases where you get distracted by the shiny, new, challenging pose—or, on the opposite end of the spectrum, getting stuck in your favorite feel-good sequence. While you definitely don’t want to lose sight of goals or the sweet sensations that keep you coming back to your mat, it’s a good idea to take a critical eye to your practice now and then to see where you can find greater balance.
That’s what yoga is all about, and practitioners of every level can benefit from going back to the basics and reexamining the actions and alignment of foundational standing poses, backbends, forward bends, and inversions.
The following list of poses stand the test of time as 10 postures every yoga practitioner should consider adding to their home practice—along with focus tips for beginner, intermediate, and experienced practitioners.
10 Dynamic Yoga Poses to Add to Your Home Practice
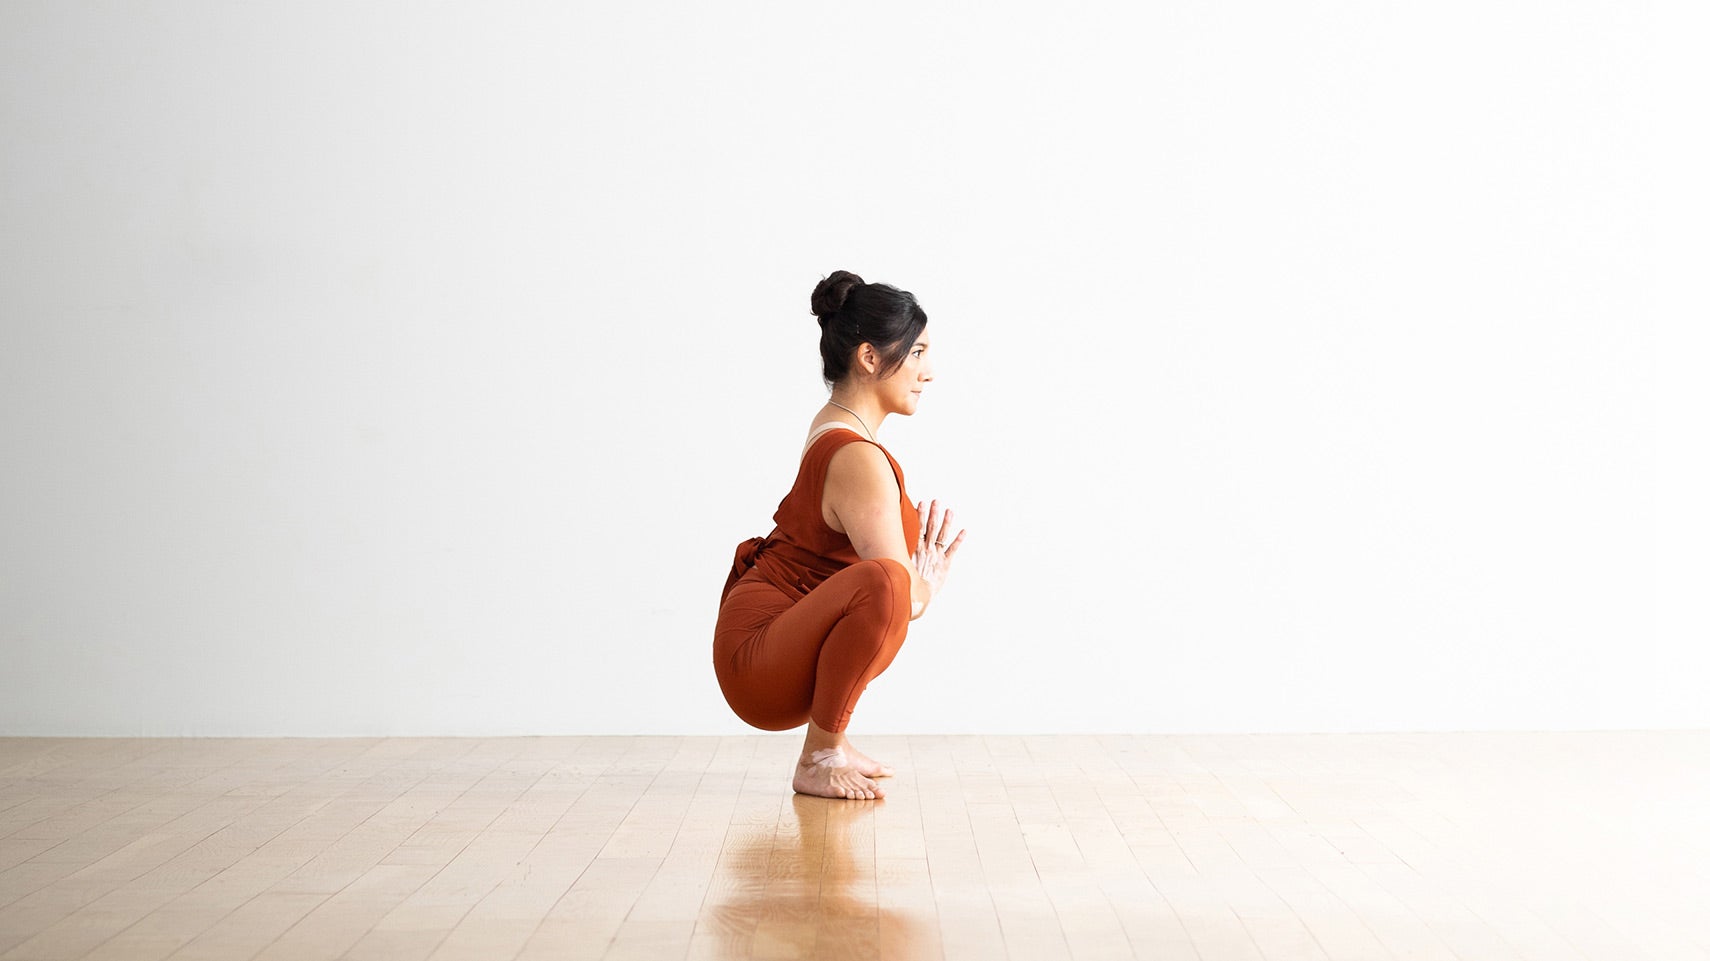
1. Squat (Malasana)
A squat releases your lower back, opens your hips, stretches your thighs. Explore the variations and tips below on how to make this pose more or less challenging.
Beginner
It’s common for beginners to struggle with resting their heels on the ground. Make sure to angle your toes outward, as well as widen your stance so your feet are at least hip-distance apart. If it irritates your knees to drop into a full squat, sit on one or more blocks. If your heels don’t touch the floor, slide a rolled blanket beneath them.
Intermediate
Intensify the hip-opening element of this pose by incorporating your arms. Lean forward to wiggle your upper arms in between your legs. Draw your palms together in front of your chest and lean forward into your thumbs. This encourages external rotation and gives you that extra ahhhh moment.
Experienced
Malasana is traditionally practiced with the feet together, knees wide, and the torso in a forward fold with the arms extended forward or wrapped behind the heels. You can try this although this pose is commonly done with the feet wider than the hips, which can be a much-needed release after a long day.
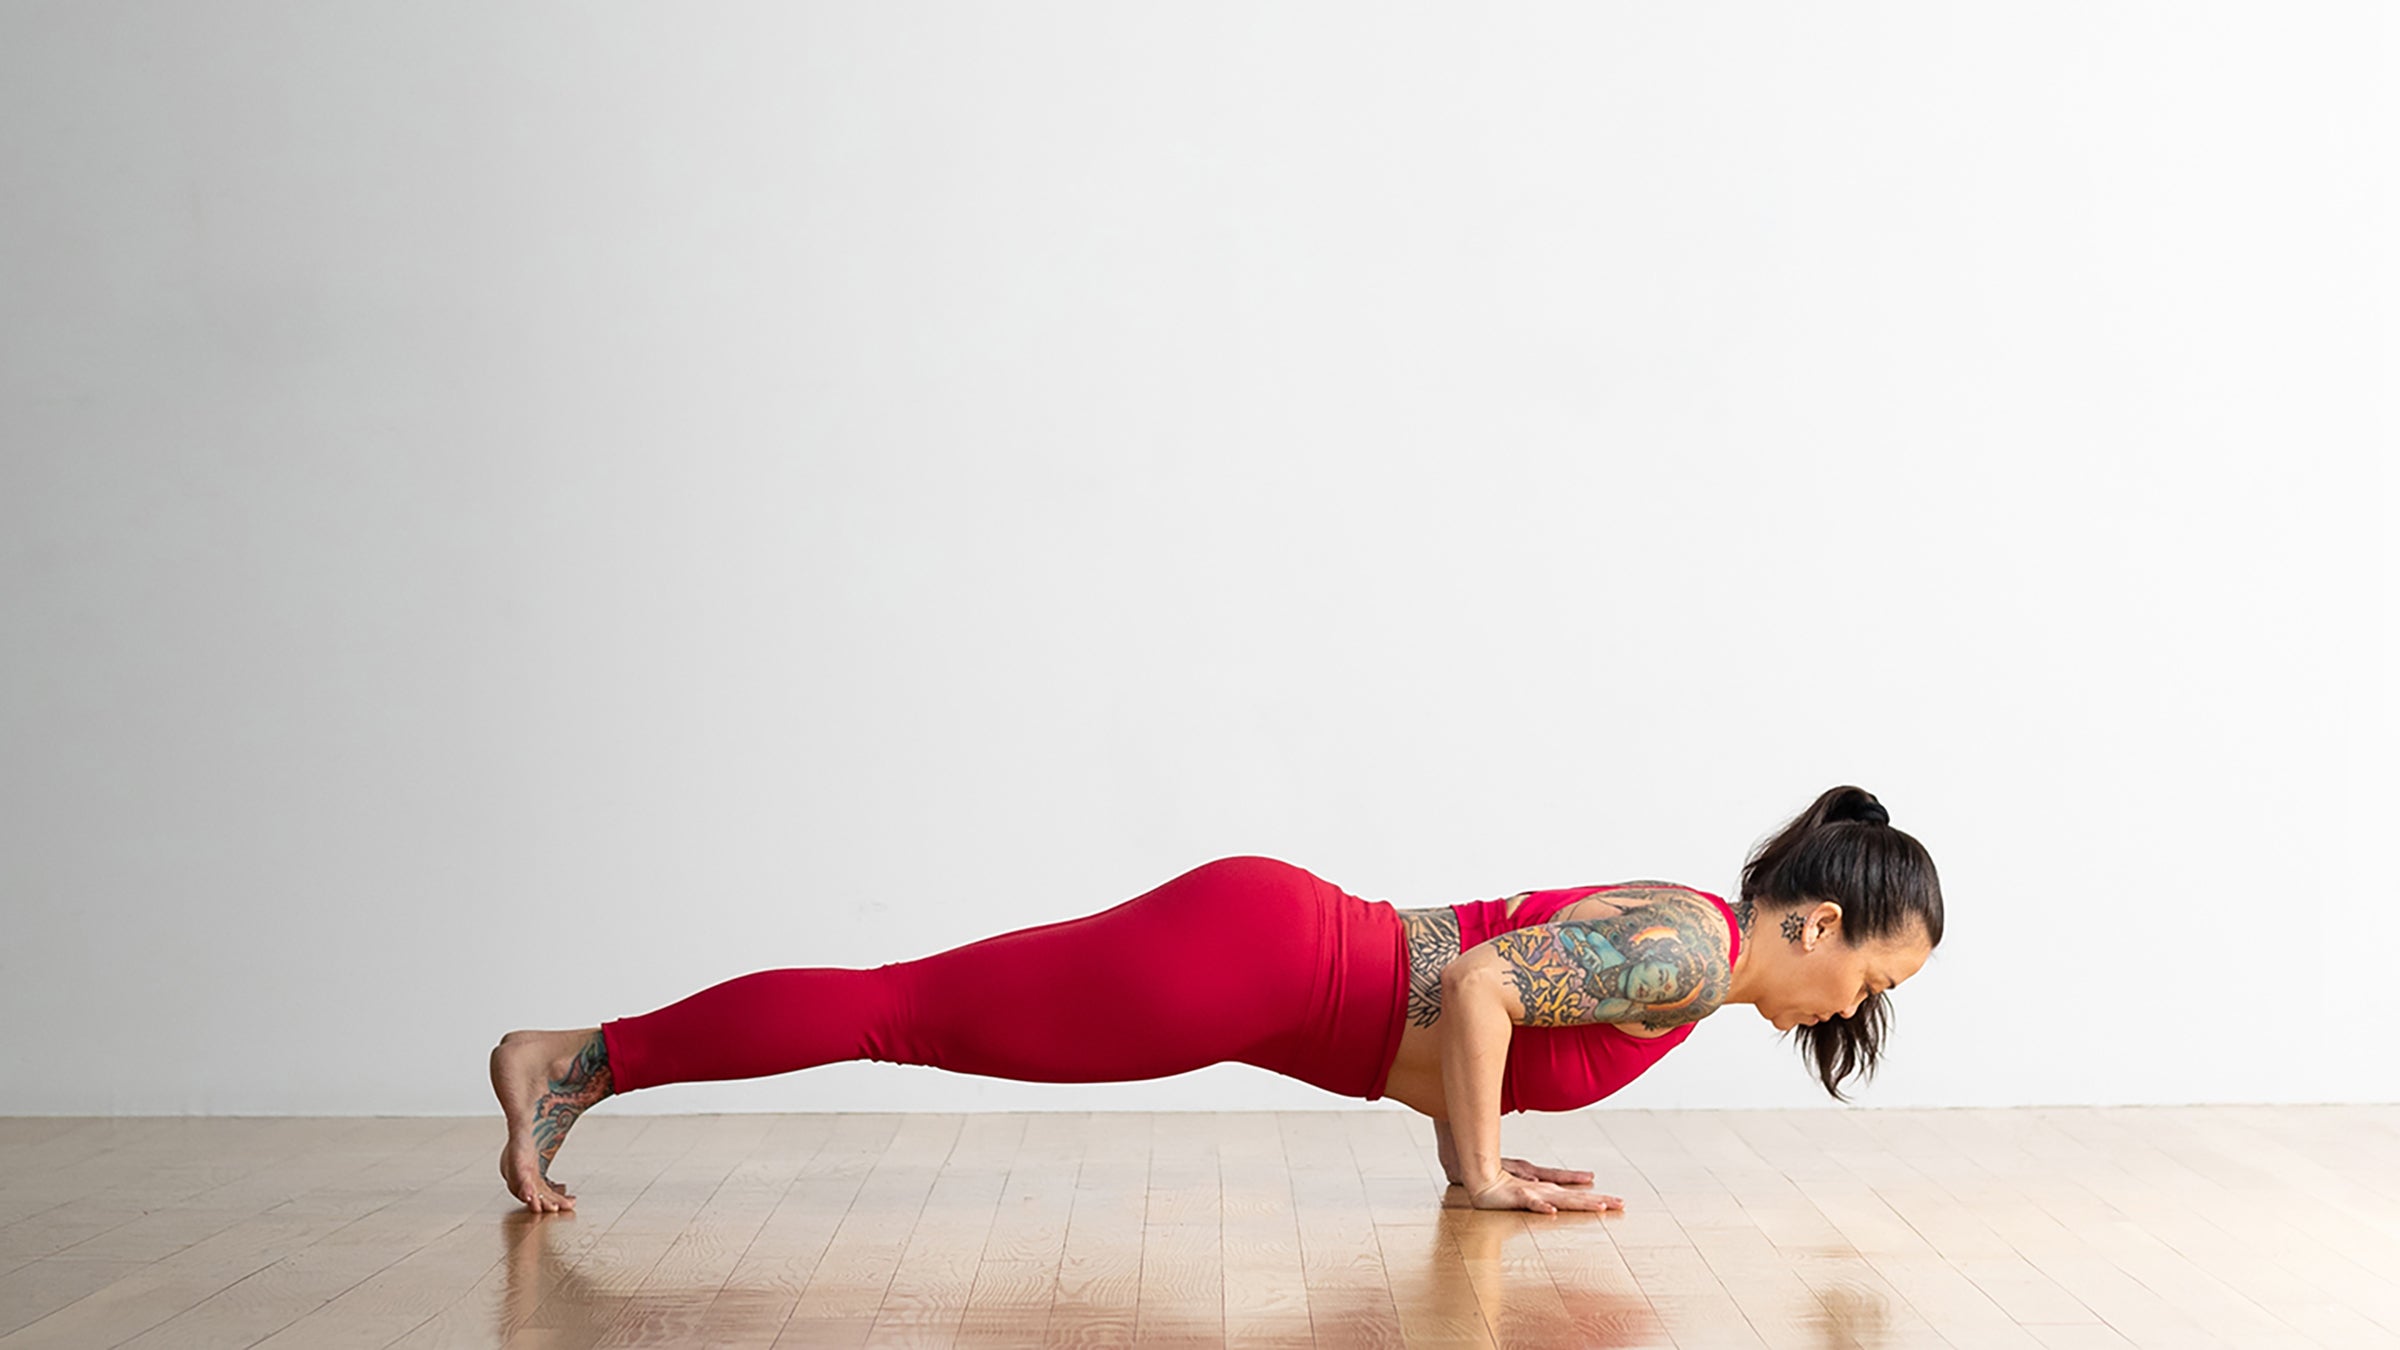
2. Four-Limbed Staff Pose (Chaturanga Dandasana)
One of the most common postures in vinyasa yoga, Chaturanga is also one of the most misunderstood. Students tend to rush this pose, which leads to misalignment. Over time, that can lead to injury. Check out my pointers below to revisit this foundational posture and begin treating it as its own pose instead of a transition.
Beginner
Chaturanga requires strength and body awareness. In order to build these skills, students learn this pose with their knees down on the mat. Focus on drawing the lower belly up to prevent collapsing in the lower back. Keep your elbows tight against your ribcage and stacked above your wrists.
Intermediate
Gaze down and only slightly forward the entire time to keep the back of your neck long. Draw your shoulders away from your ears and focus on reaching your chest forward as you lower your body so your elbows stay over your wrists.
Experienced
Use your full breath! People love to fly through this pose. Slow it down and take a full inhalation in Plank and a full exhalation as you come into Chaturanga. Don’t transition out of it until your exhalation is complete. This takes awareness and prevents you from moving too quickly and falling out of alignment.
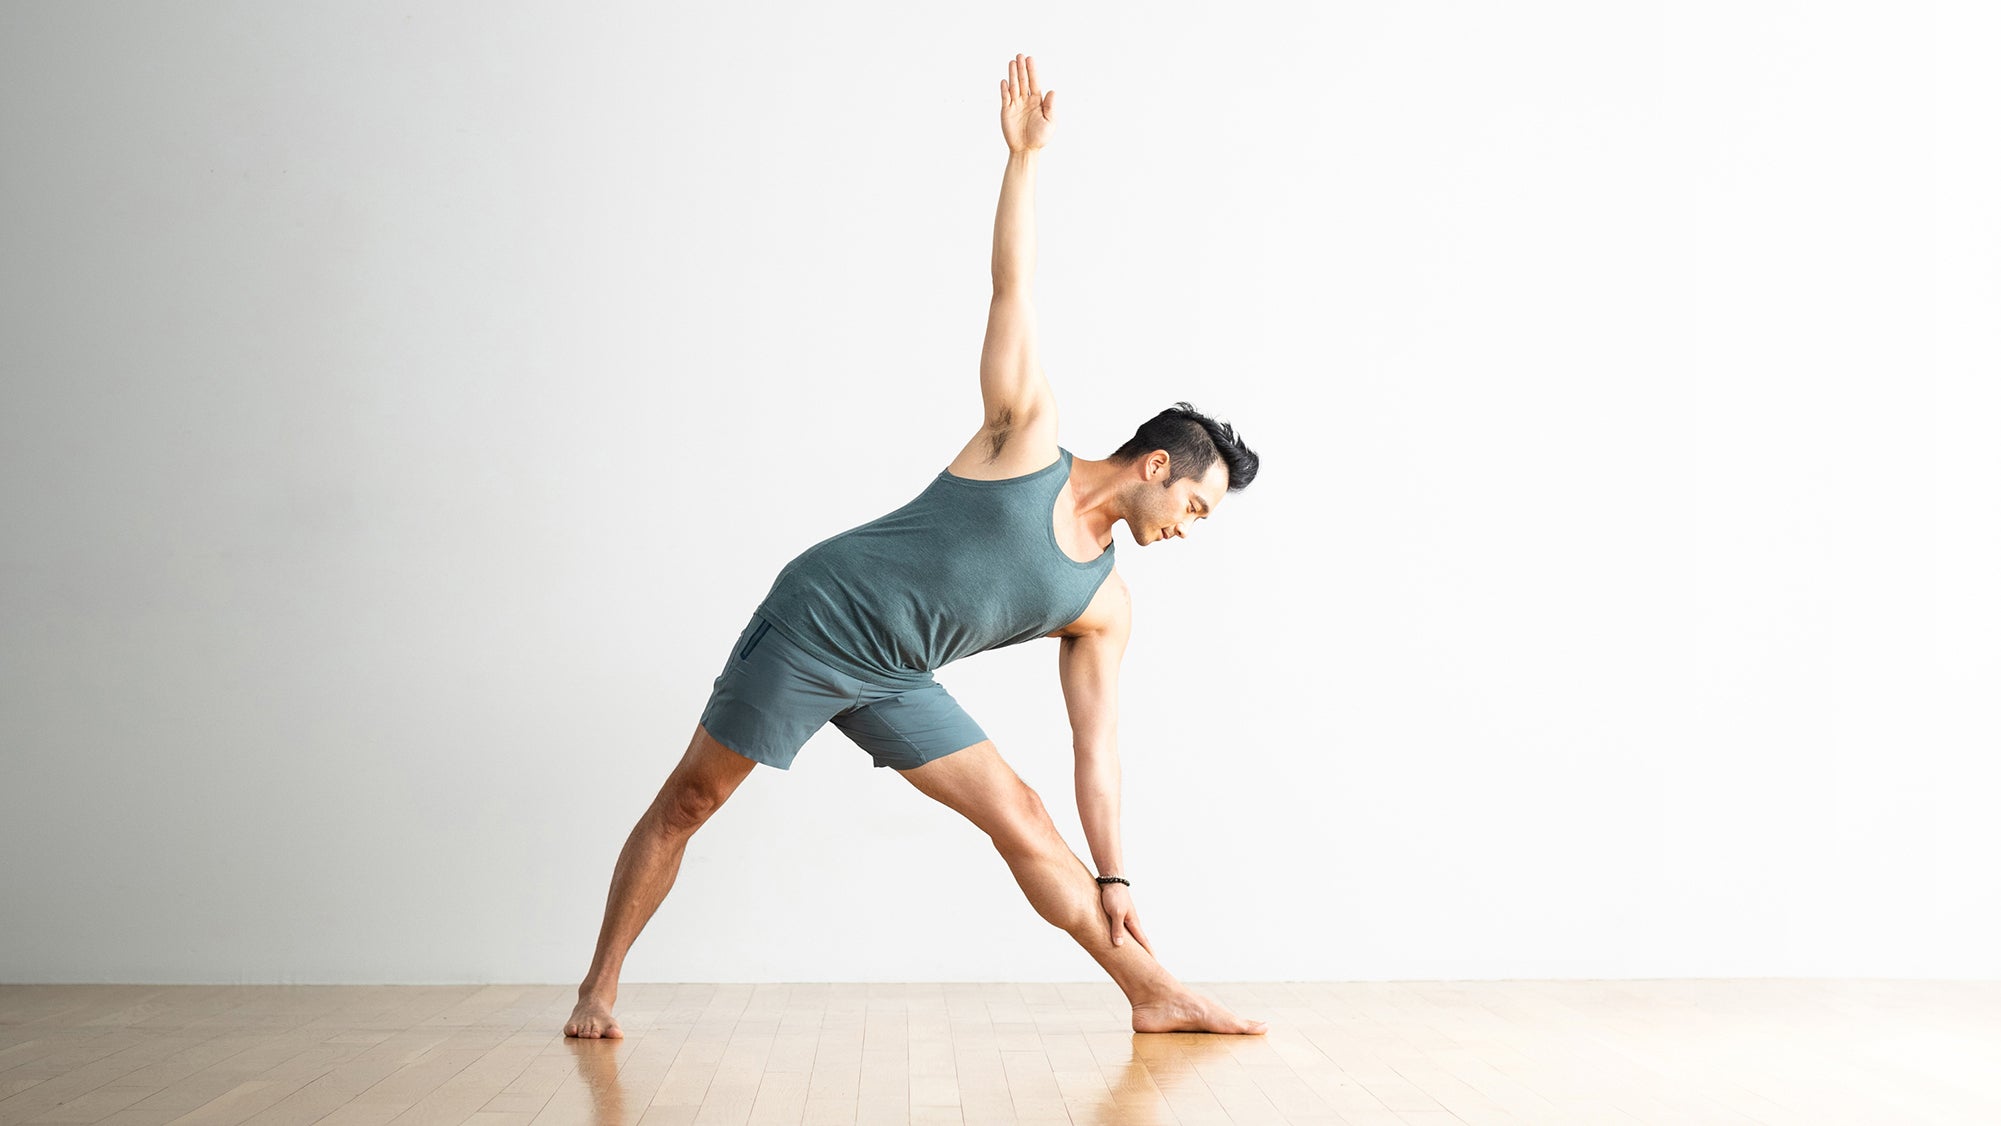
3. Extended Triangle Pose (Utthita Trikonasana)
Such a classic standing pose! Trikonasana is a creative way to release your lower back, strengthen your core, and expand your body and mind.
Beginner
Students tend to collapse their lower bodies trying to get their hands or palms to the ground. Skip that step and place your palm either on a block or your shin. This enables you to evenly stretch both sides of your ribcage, creating even length along your side body.
Intermediate
It’s so easy to get sassy in this pose! Most people stick out their butts, arch their lower backs, and puff out their ribs. Focus on corseting your ribcage in (wrapping the bones towards your midline) and keeping your lower belly engaged and lifted to create space in your lower back.
Experienced
Keep your torso in line with your front leg (most students lean toward the inside). Can you keep both sides of your waist even, ribs in, belly engaged and lower back long as you lean back? Of course, you can! Practice, practice, practice.
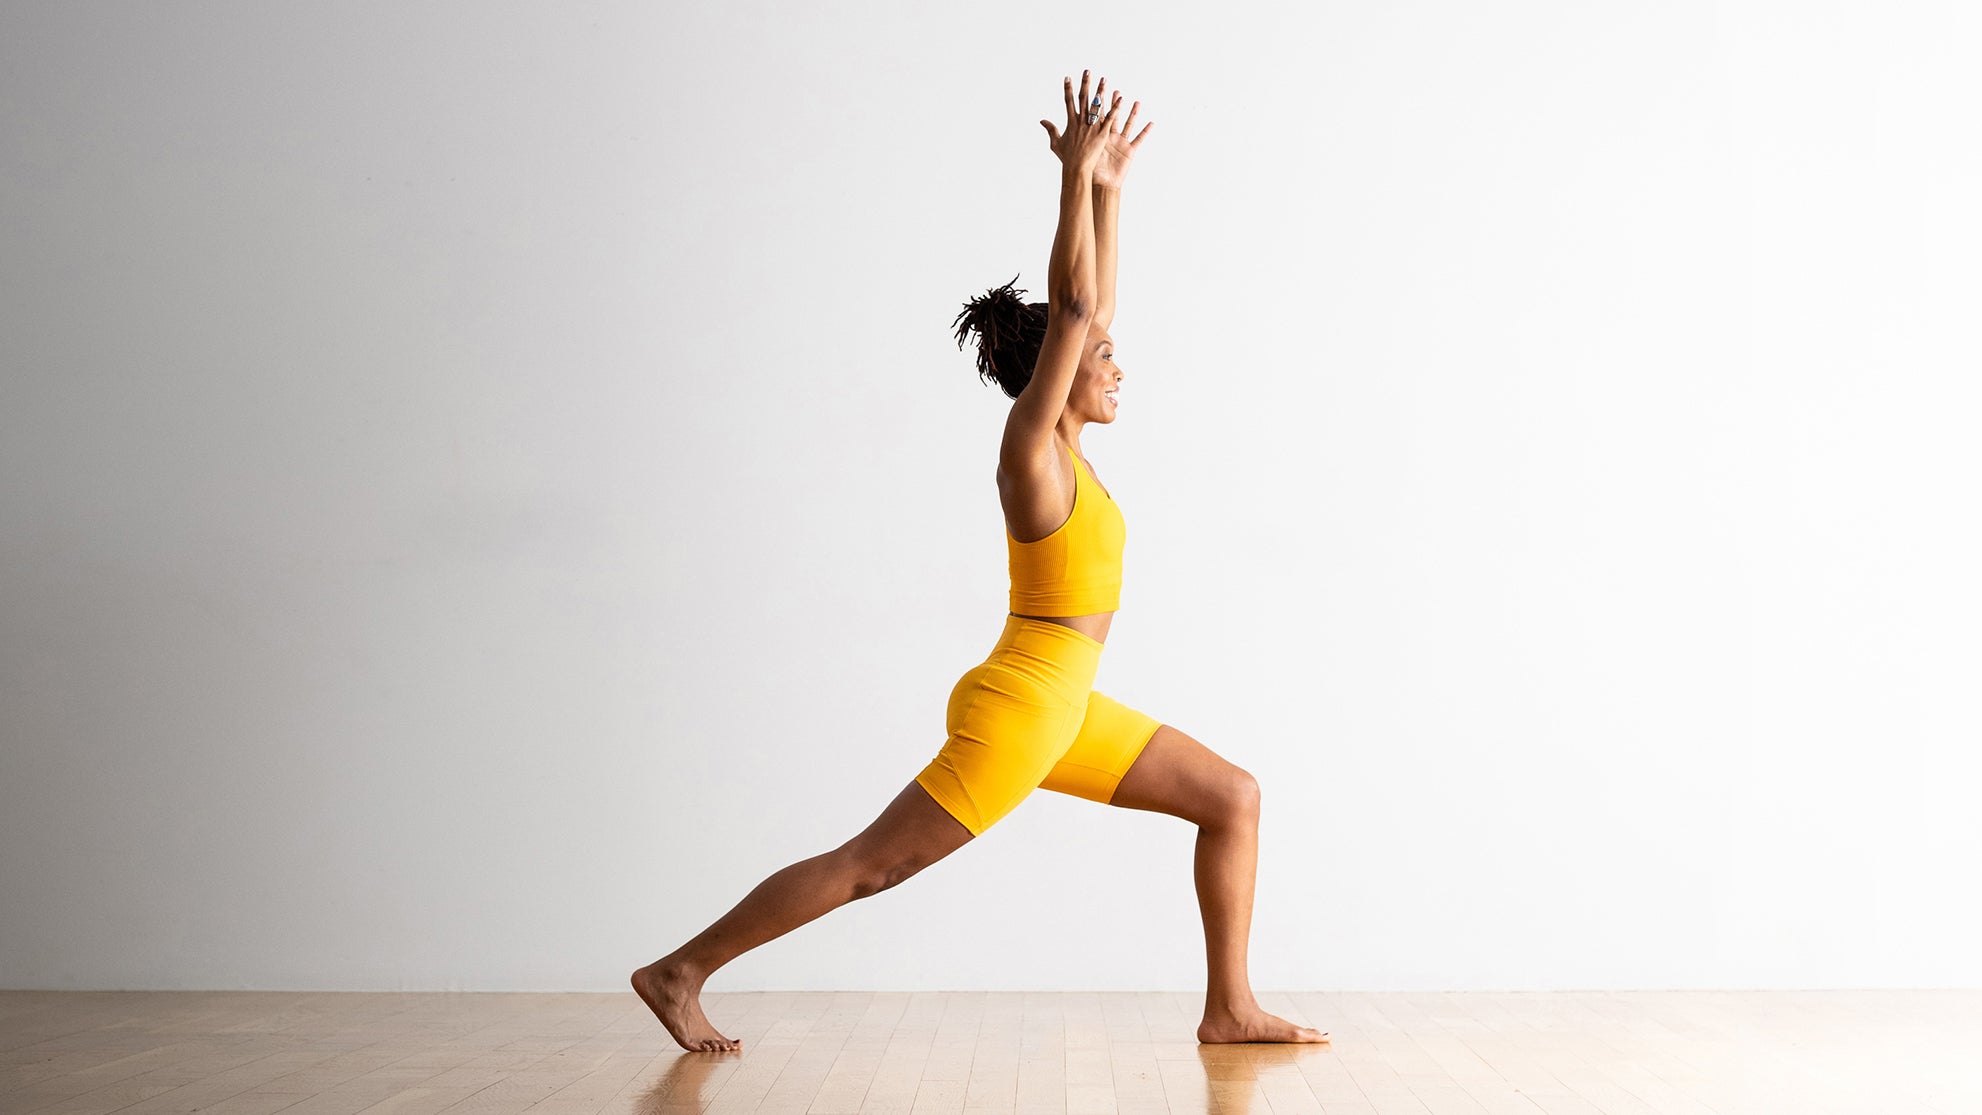
4. High Lunge
Can you imagine a yoga practice without this perfect standing pose? High Lunge is a go-to posture for opening your hips and psoas, encouraging space in your chest, and feeling powerful on your feet.
Beginner
If you struggle to find your balance in this pose, look down. Odds are your feet are positined too narrowly. Make sure your feet are hip-width apart. Widening your stance allows you to balance more easily.
Intermediate
There’s a tendency to lean forward in this pose, which is often caused by over-arching your lower back or tightness in the psoas connected to your back leg. Bend your back knee as much as you need to enhance mobility in your pelvis. Draw the front of your pelvis up to neutral (like a bowl full of kombucha that you don’t want to spill) and start to straighten your back leg. It may not fully straighten, and that’s fine, because you’re in a stronger posture.
Experienced
Try adding the element of a backbend in your upper body. Follow the tips for beginner and intermediate practitioners first. Then reach your arms overhead and interlace all of your fingers except for your thumb and index. Keep the base of your neck relaxed as you lift your chest up and curl your upper chest. Use your index fingers to draw an imaginary line along the ceiling going up and back. I tell students to “Keep the base of your building strong,” aka, engage your core to prevent your pelvis from pitching forward.
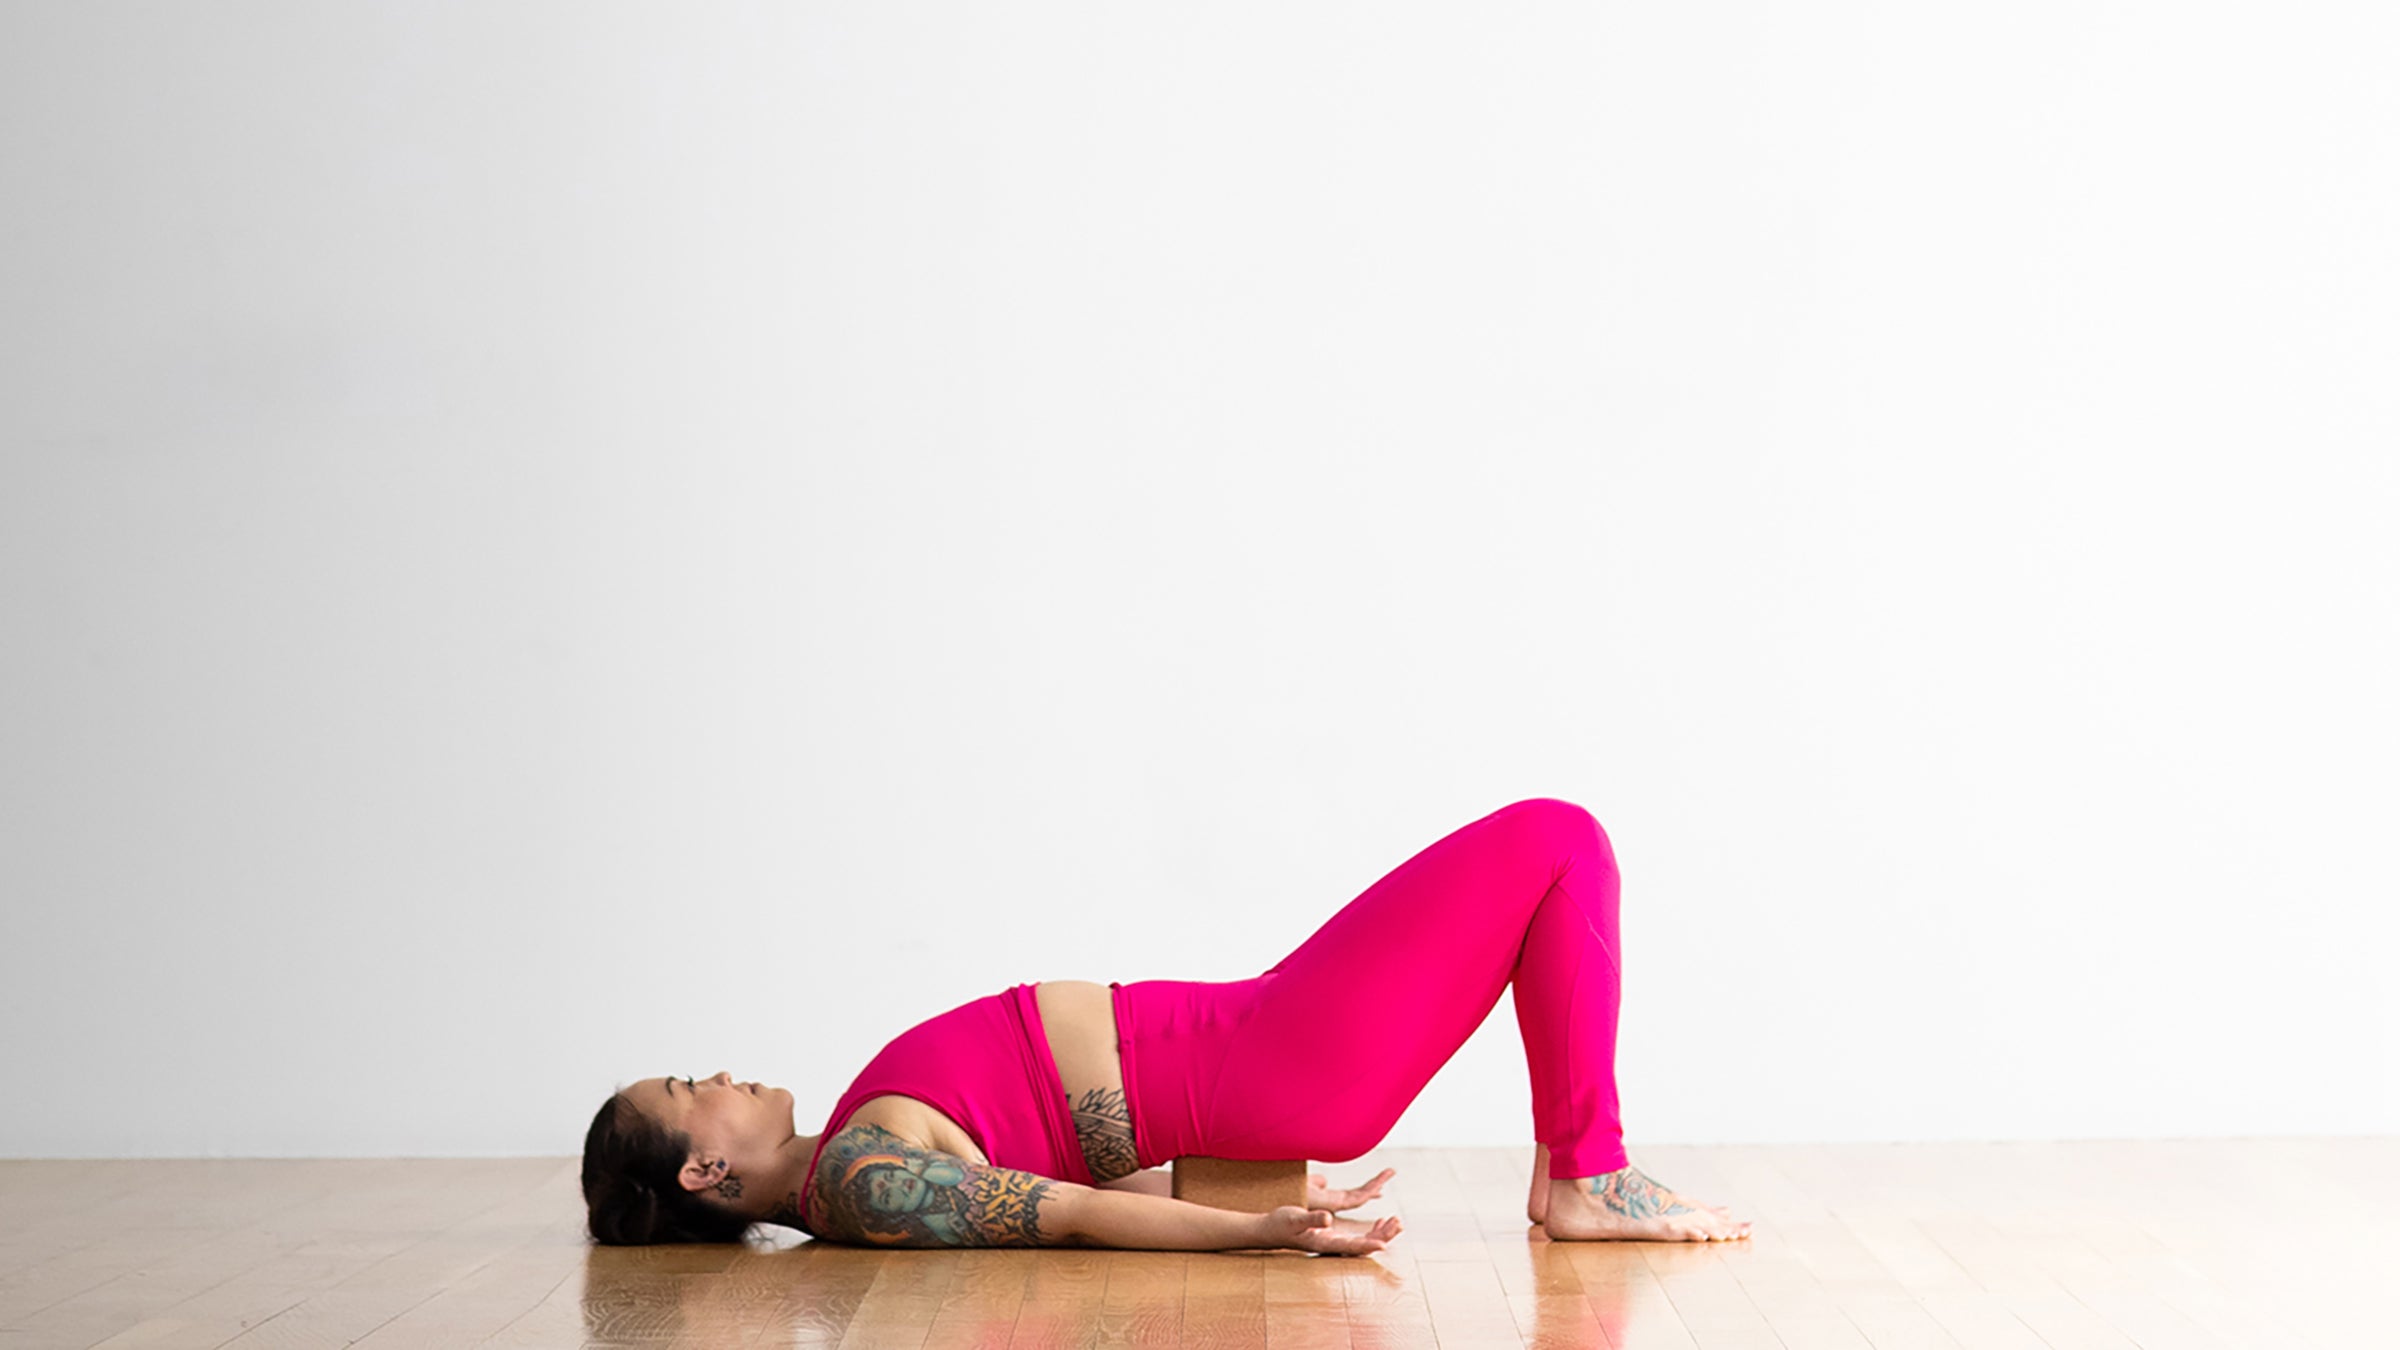
5. Supported Bridge Pose (Salamba Setu Bandha Sarvangasana)
This variation of Bridge Pose with a block under your lower back might become your new happy place. This is a great alternative to Shoulderstand and a relaxing way to release your front and your lower back.
Beginner
Place a block on its lowest level underneath your sacrum. (That’s the flat, triangle-shaped bone that’s toward the bottom of your spine.) If the block feels uncomfortable on your lower back, try placing a folded blanket on top of it. Draw your thighs toward each other, keeping them hip-distance apart. Breathe here.
Intermediate
Place a block on its medium level underneath your sacrum. (You might need to press up onto your tippy toes to fit the block underneath your back). Interlace your fingers in front of the block and hug your shoulders in.
Experienced
Follow the steps above and try to get a firm grip with your hands and keep your arms hugging in. Then extend one leg toward the ceiling, pushing through the heel, in a modified Shoulderstand.
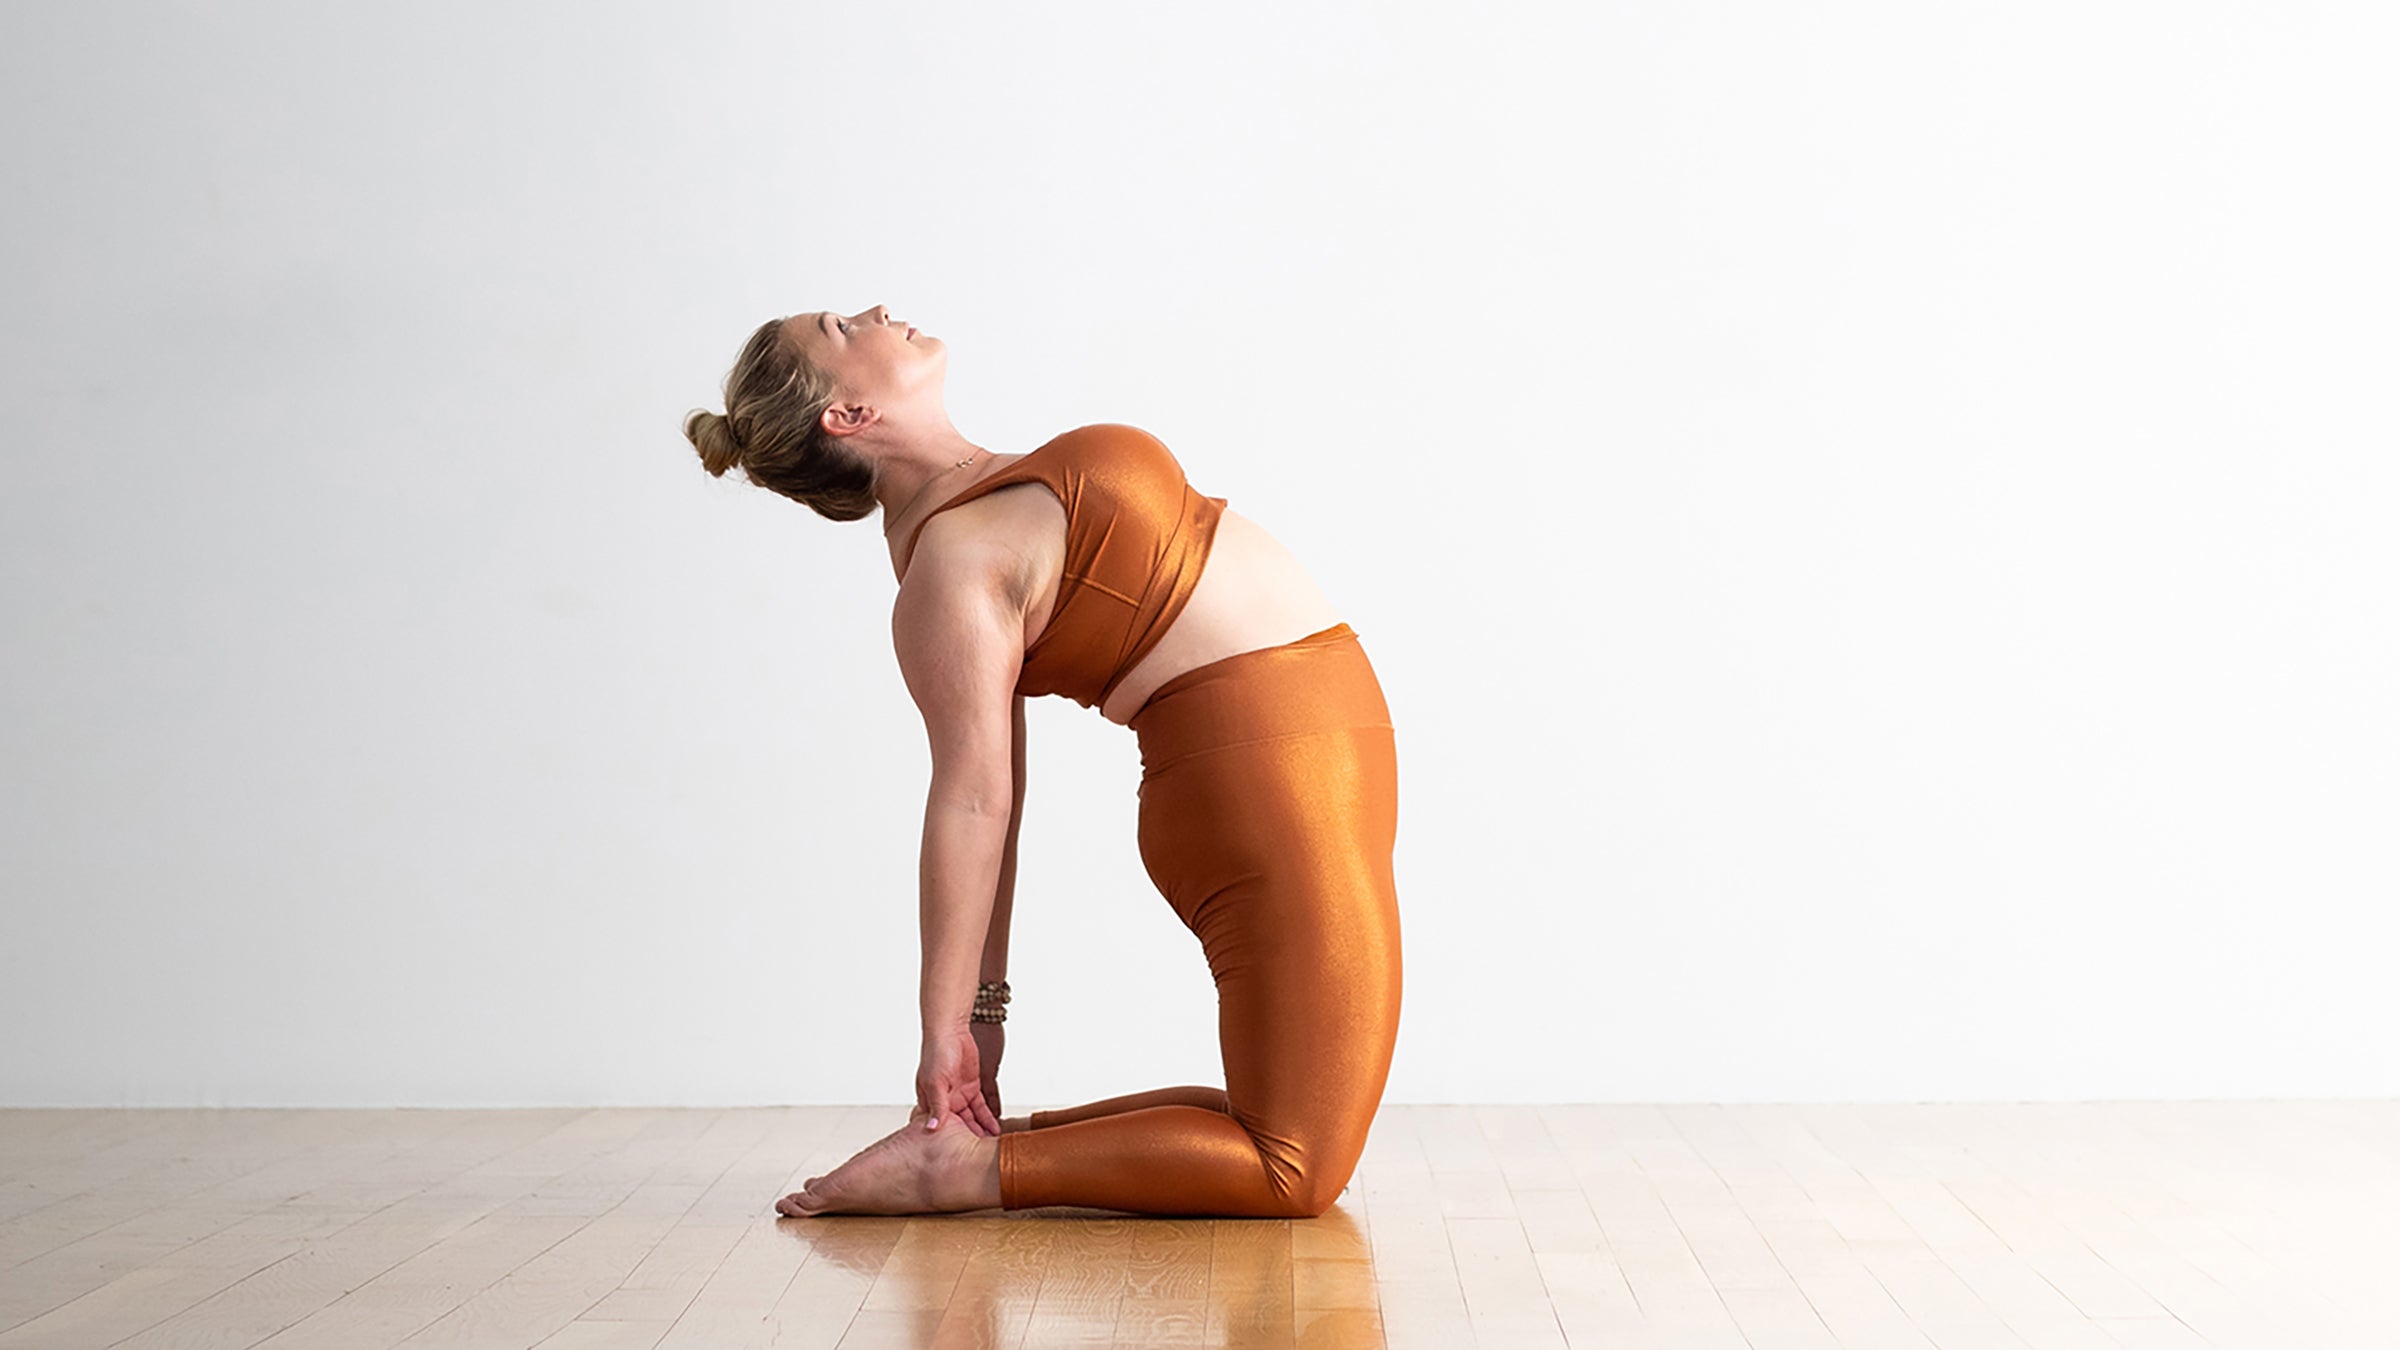
6. Camel Pose (Ustrasana)
The key to Camel Pose is to maintain proper alignment in the body to keep the lower back supported and the neck happy. The beauty lies in the fact that there are so many variations. Here we go!
Beginner
Come into a kneeling position with your shins hip-width apart. Tuck your toes. Place your hands on your lower back, encouraging your tailbone to drop down toward the mat while your lower belly lifts to neutralize your pelvis. Keep your hands on your hips and lift your chest as you roll your shoulders back. Keep your gaze forward. Breathe here.
Intermediate
Follow the same steps as above, but draw your hands to your ribcage (instead of your lower back) to encourage them to lift and expand. Roll your shoulders back and keep your arms neutral as you drop your hands down to grab your heels. Keep your hips stacked over your knees and your chest lifted.
Experienced
Follow the beginner and intermediate actions above, but this time, keep the backs of your feet flat on the mat. After you adjust your ribs, keep the powerful lift of your chest and let your head fall back. Grab your heels and soften your face and throat.
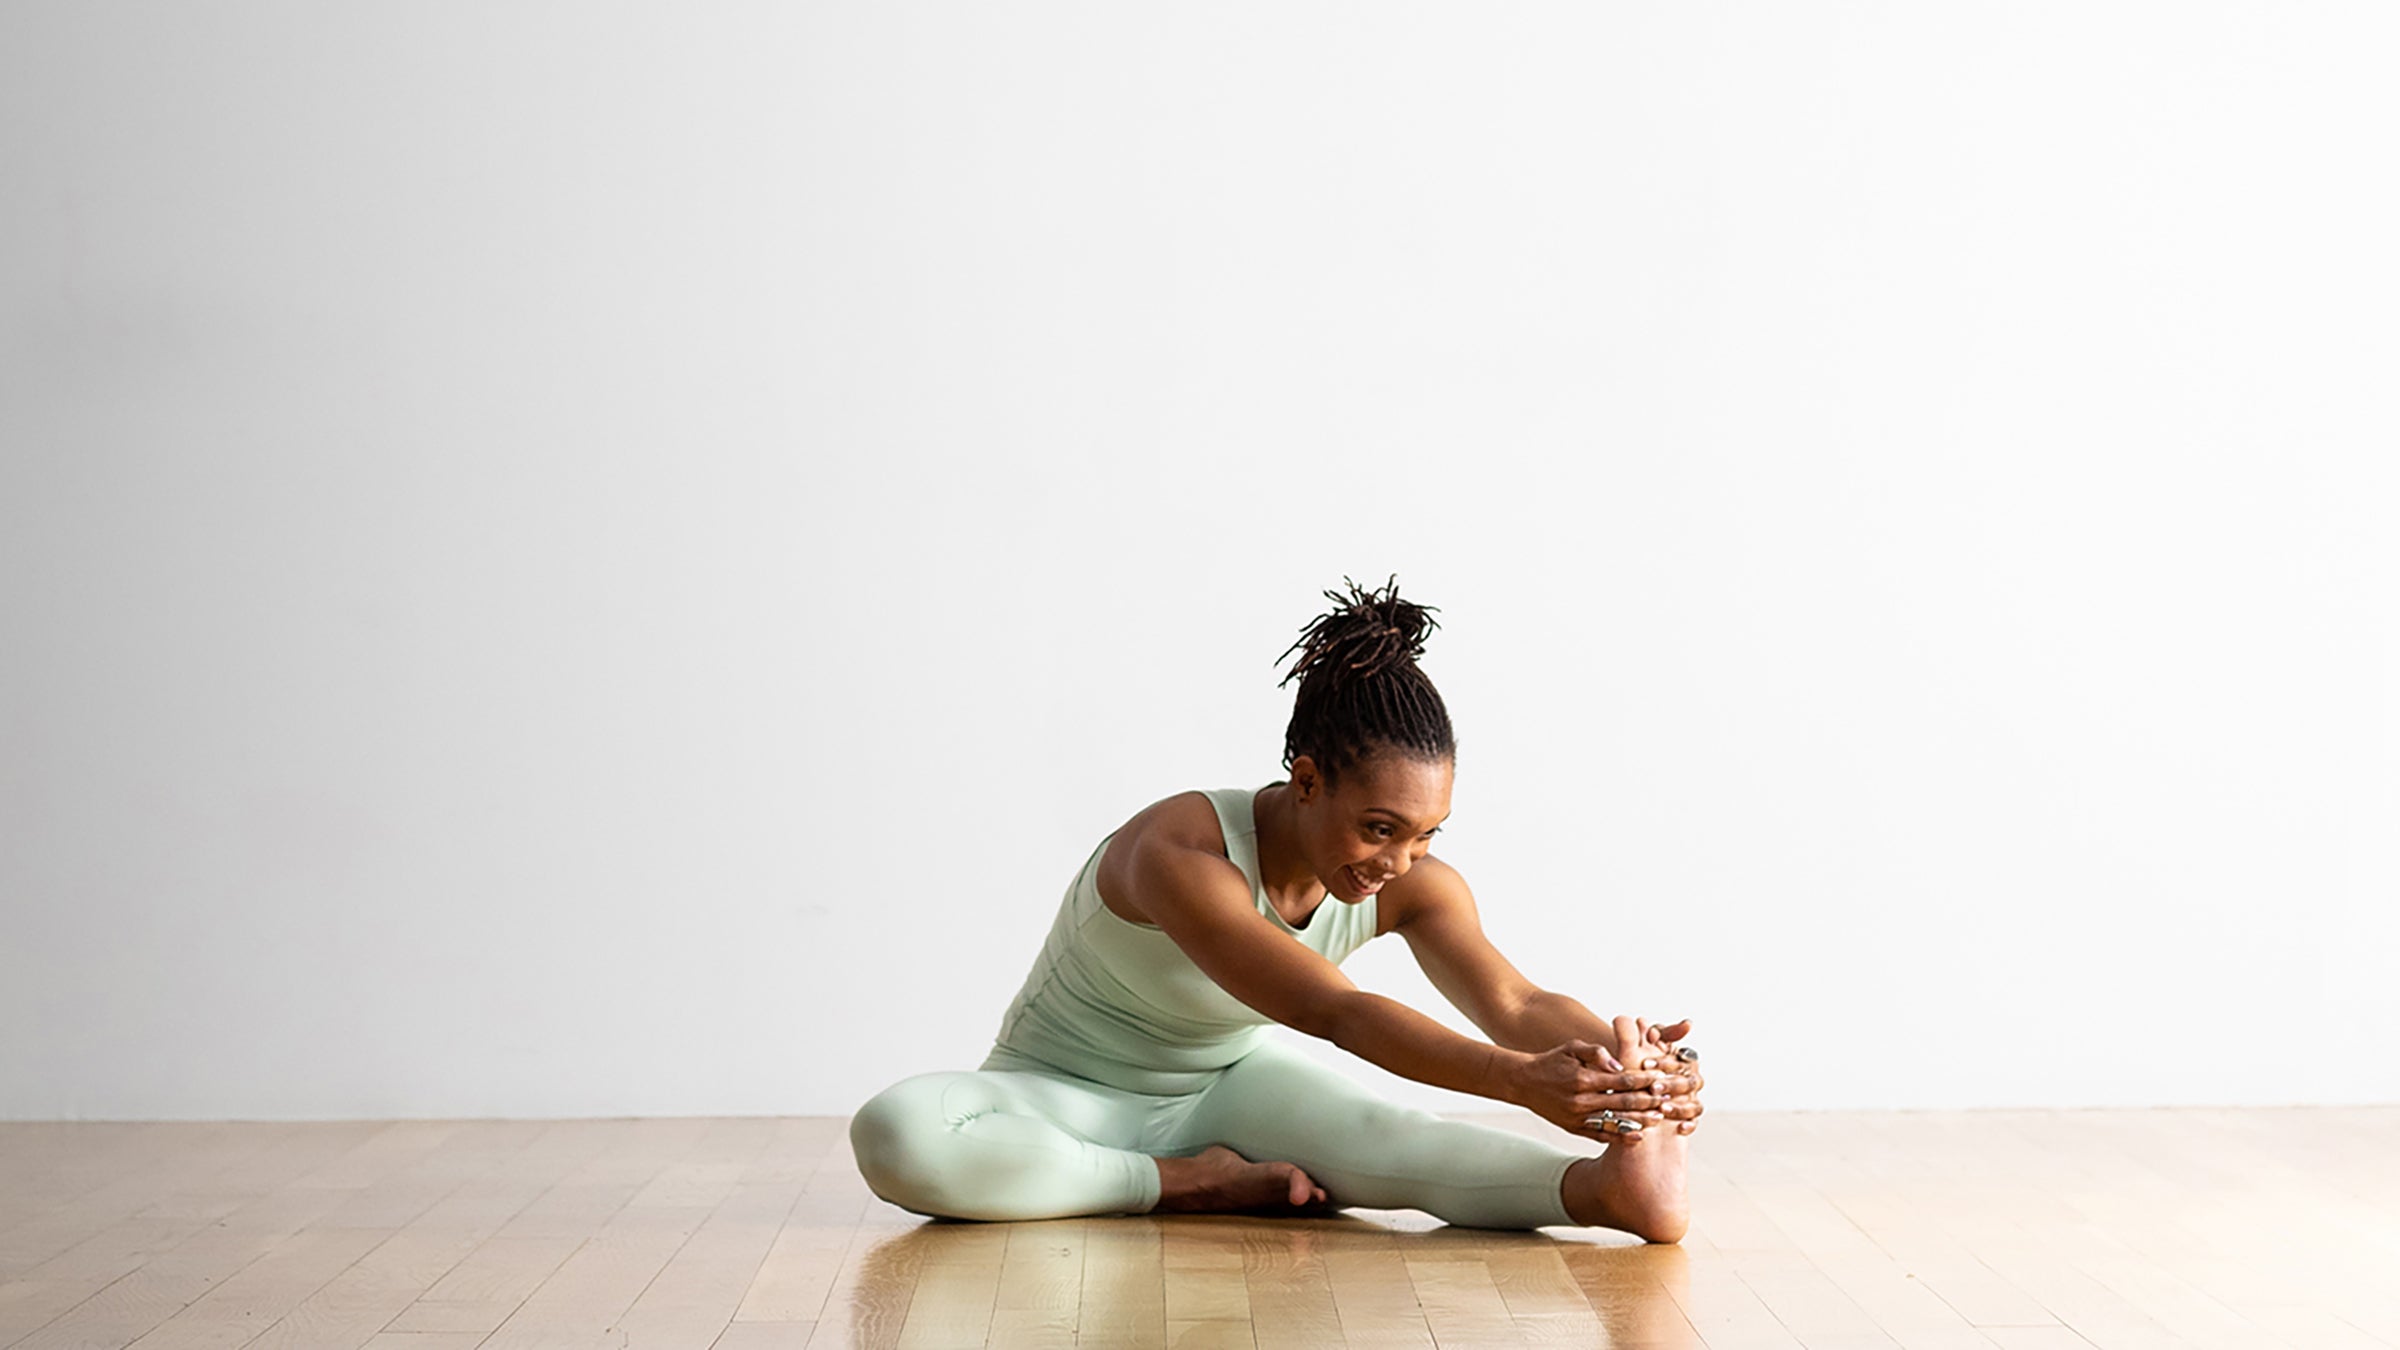
7. Head-to-Knee Forward Bend (Janu Sirsasana)
This fabulous forward fold releases the calf and hamstring of your straight leg with the added benefit of opening the hip of your bent leg. Head-to-Knee Forward Bend also teaches the student to notice the effects of small nuances, such as squaring the chest with your straight leg.
Beginner
Sit on a folded blanket or block. Place a strap over the ball of your straight-leg foot. Hold onto each side of the strap and focus on sitting tall without rounding your spine. Gently pull back on the strap so you feel it pull into your foot, encouraging it to stay flexed.
Intermediate
To start, inhale and extend your spine long. As you exhale, pivot your belly button to face your straight-leg knee. Keep the twist and length as you grab either edge of your straight-leg foot.
Experienced
Follow the steps above, but as your flexibility increases, try to reach your hands past the ball of your foot and clasp your outer wrist with your inner hand’s thumb and middle finger Inhale as you clasp, and keep your gaze forward. Exhale and bend your elbows to draw yourself deeper into the fold.
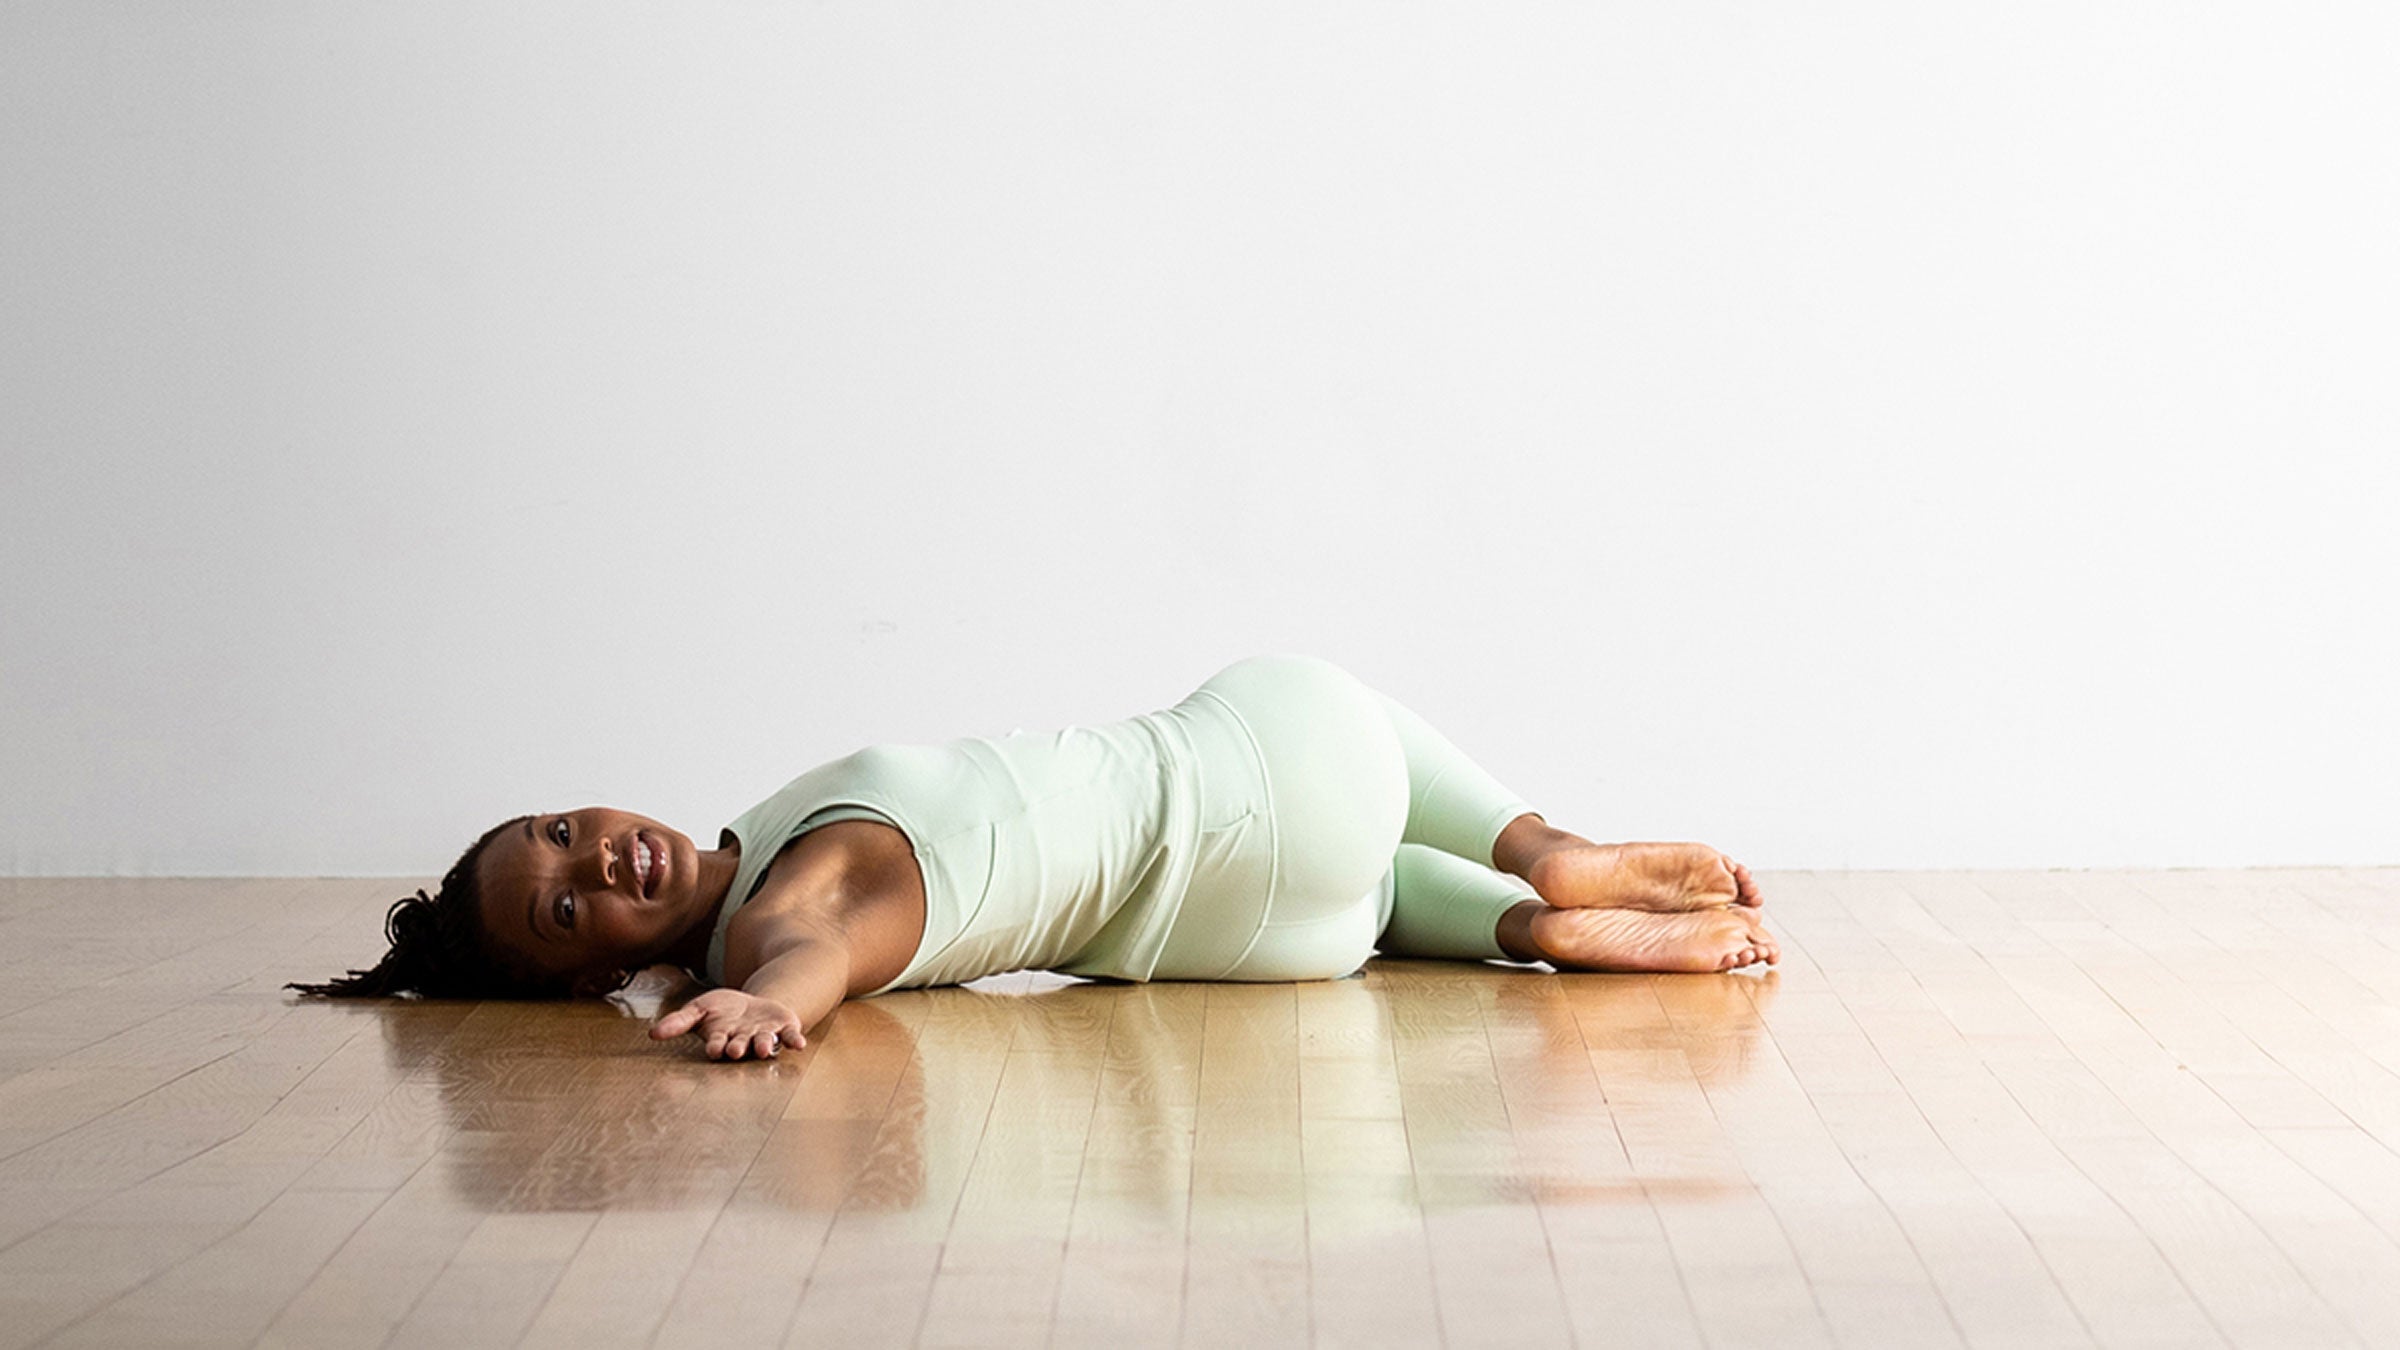
8. Reclining Supported Twist
A reclining twist is a great foundational pose to teach yous how to twist safely. If you can learn the mechanics of a twist here, you’ll be safer when you practice this movement in more experienced postures.
Beginner
Don’t force your knees to touch! You want this pose to meet you where you are rather than force yourself into a twist. You can take a folded blanket in between your knees to help support your top leg rather than overstretch your muscles.
Intermediate
Focus on your spinal alignment. It helps to scoot your hips an inch or two to the left before you lower your knees to the right to keep your back in a straight line. If it feels comfortable, turn your gaze to the opposite side of your knees. Tuck your chin ever so slightly to lengthen the back of your neck and keep that alignment from head to sit bones.
Experienced
Less is usually more. If you feel like you can safely handle an additional stretch, rest your opposite hand on your top thigh. Even this gentle weight can assist with intensifying the pose.
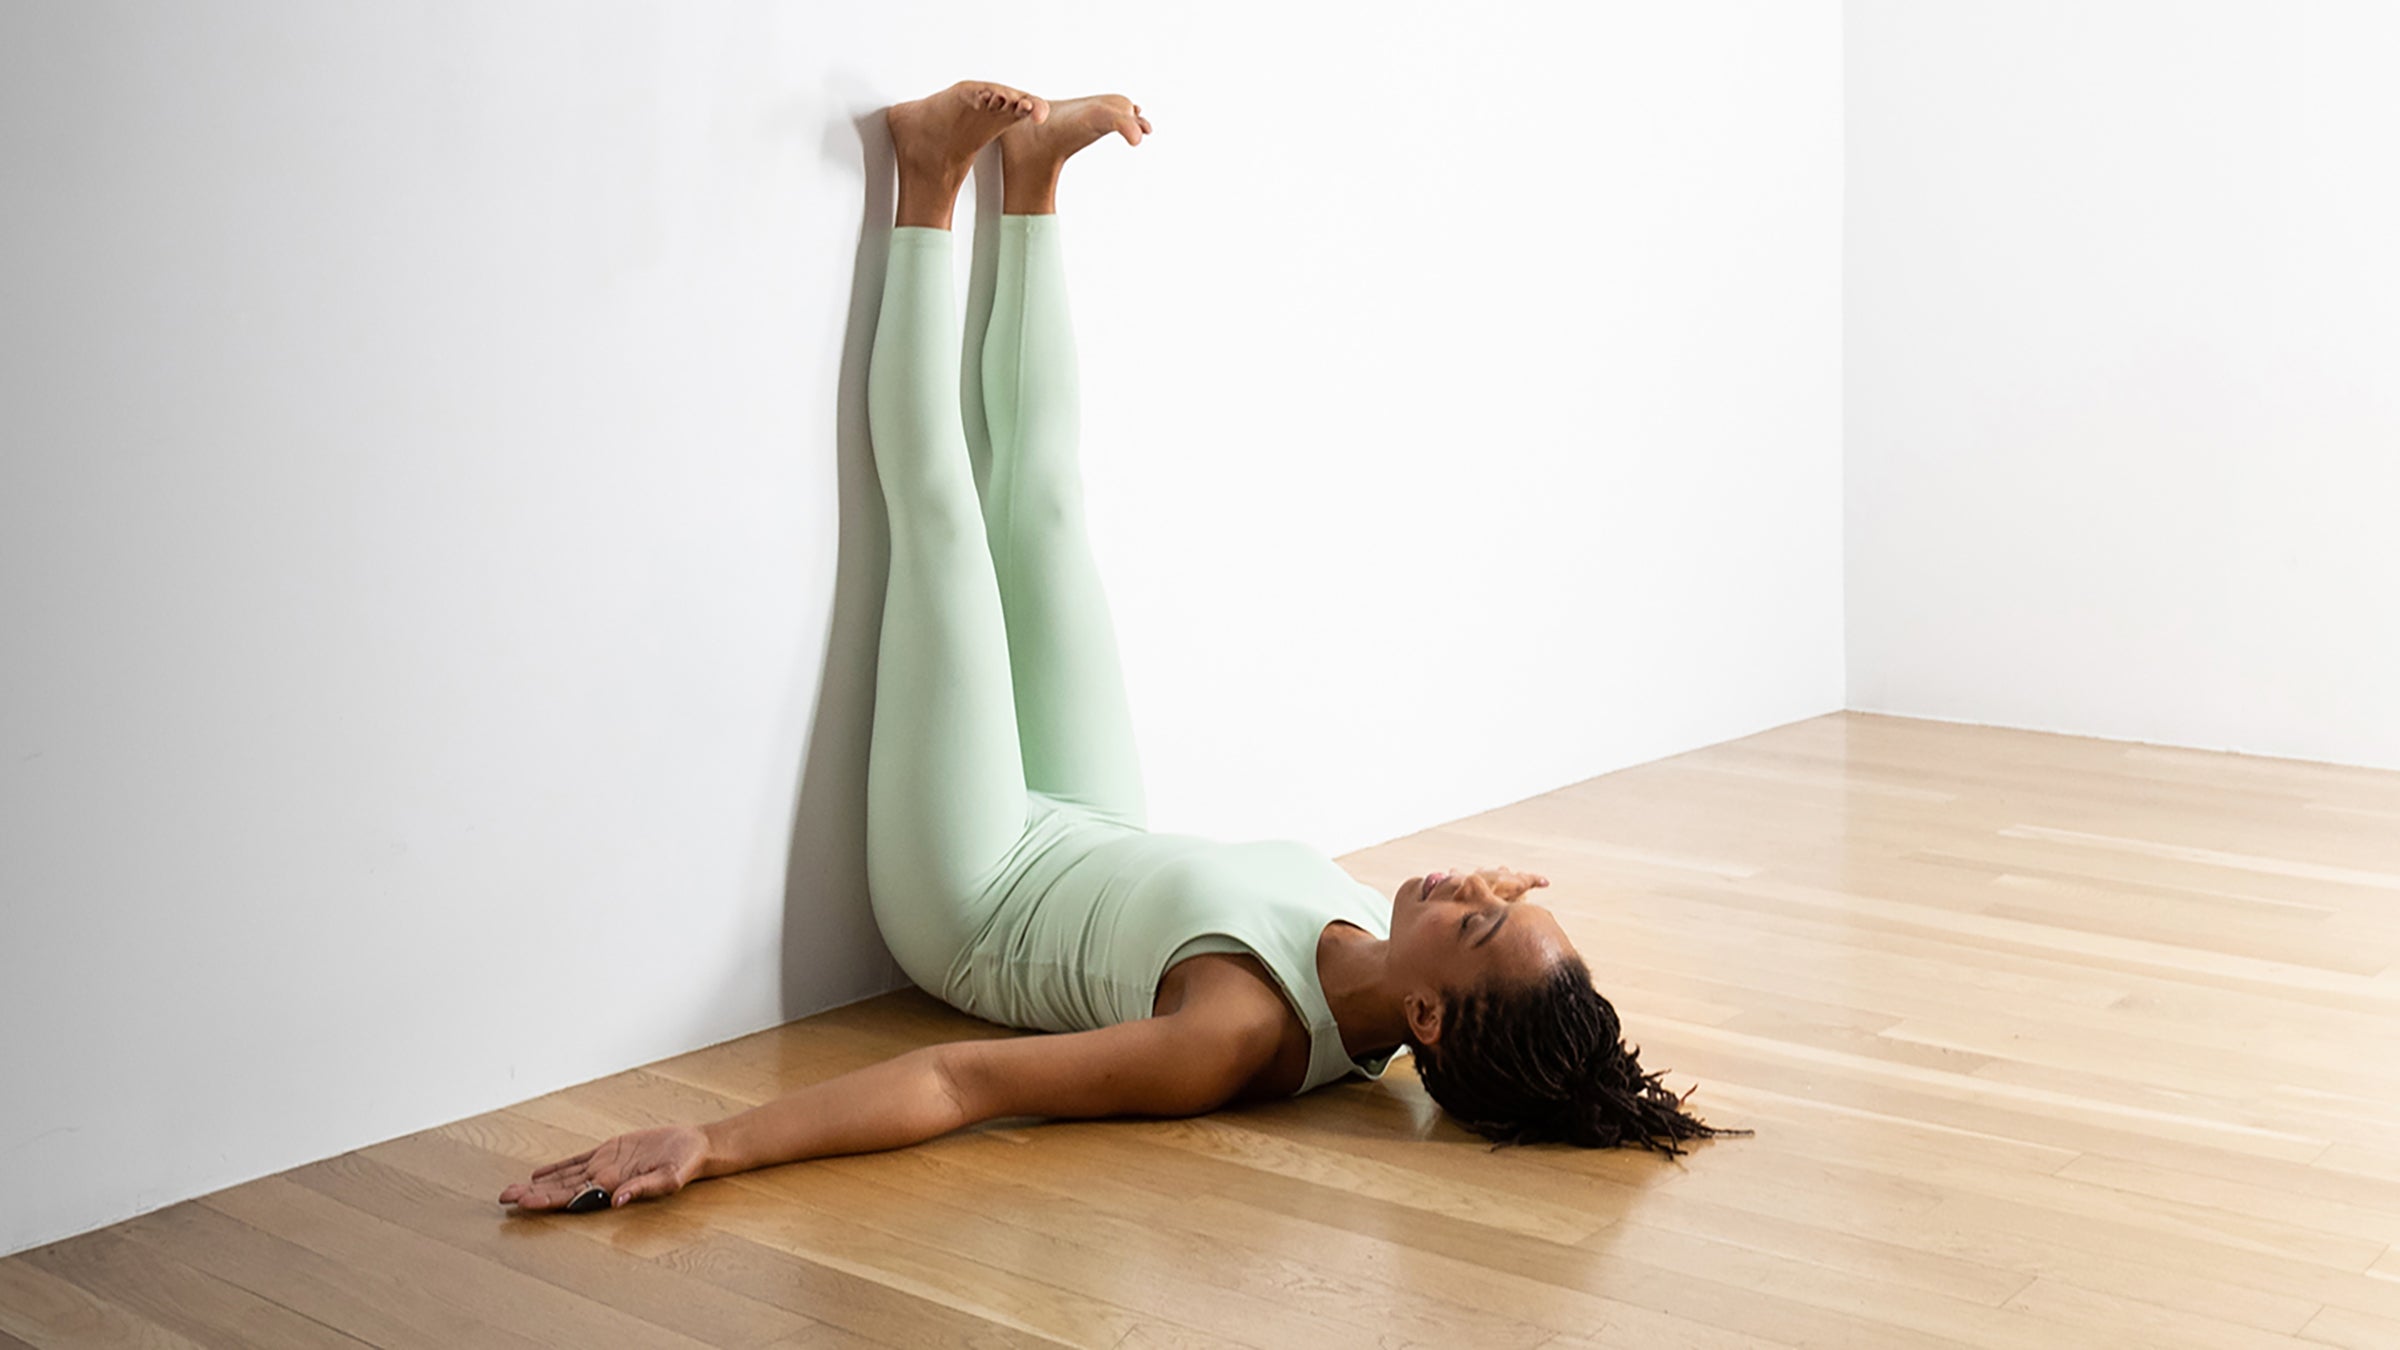
9. Legs-up-the-Wall Pose (Viparita Karani)
This is such a glorious posture and great for all levels of students! Legs-up-the-Wall Pose is the best way to relax after a long day or long yoga practice on your feet. It’s believed to help improve circulation and is sometimes recommended for those who struggle with insomnia.
Beginner
Place a folded blanket or bolster lengthwise alongside the wall. Sit on it sideways with one hip touching the wall. As you lie down, swivel your hips so they stay on top of the blanket or bolster. Your upper back should be rested on the floor while your lower back remains elevated on the prop.
Intermediate
Lose the blanket or bolster and practice Legs-Up-the-Wall with your hips flush against the baseboard.
Experienced
Make a lasso out of a strap or belt and tighten it around the balls of both of your feet. Bring your legs up the wall and wrap the strap around your shins twice. Take the tail end of the strap and thread it through the loop around your feet and two loops around your shins to tighten everything together. Let your legs fully relax.
This article has been updated. Originally published August 1, 2021.