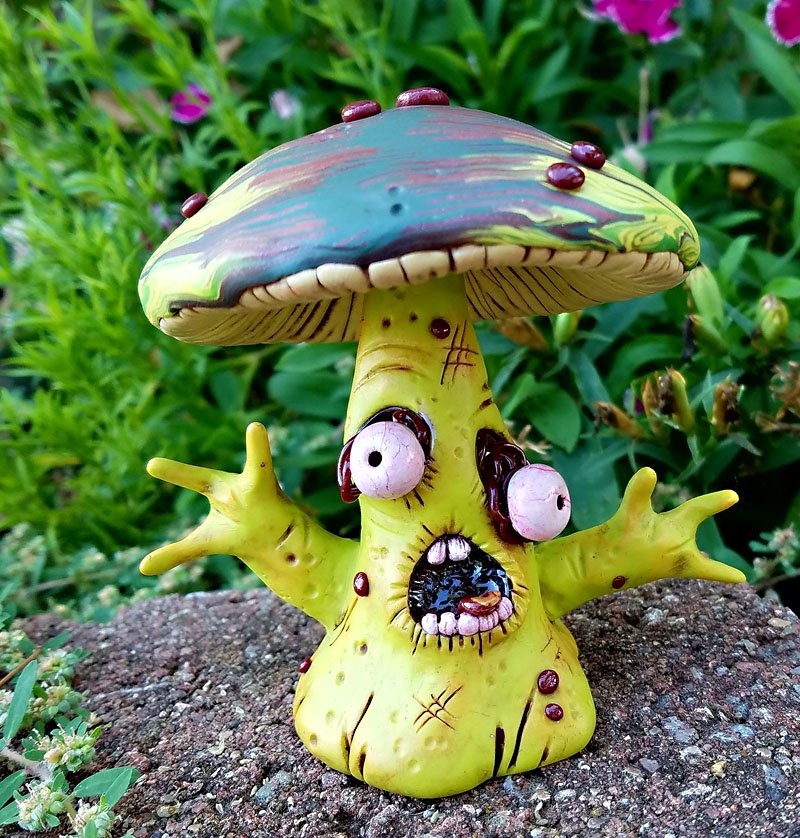
Premo Walking Deathcap Zombie Mushroom
Premo Walking Deathcap Zombie Mushroom
Read More
This Zombie is so cute, you will want to display him all year long!
by Miranda Farrand of Miranda’s Critters
These colors except for the White can be substituted for whatever color combination you would like. You will not use the full 2 oz blocks for the colors unless you make a giant shroom
Read Less
ADDITIONAL SUPPLIES
Aluminum foil

Project Instructions
Your workspace: Please make sure your work area is covered and you are not working on an unprotected surface. We recommend working on the Sculpey® Work ‘n Bake Clay Mat, wax paper, metal baking sheet, or disposable foil. Uncured clay may damage unprotected furniture or finished surfaces. Be sure to cover your crafting area appropriately.Getting Started:Start with clean hands, unwrap and knead clay until soft and smooth, or condition by running clay though a Pasta Machine. We recommend using a designated machine for clay purposes only. When working with multiple colors, clean hands with soap and water or baby wipe before switching colors.Shape clay, pressing pieces firmly together. Wash hands after use. Baking:Begin by preheating oven to 275 °F (130 °C). After you are done creating; for best results bake clay on an oven-proof surface such metal, aluminum foil, an index card or the Sculpey® Clay Mat at 275°F (130 °C) for 30 minutes per ¼" (6 mm) thickness according to package directions. Oven safe glass or ceramic surfaces are also acceptable for baking; however please note that the baking times may take longer as the glass or ceramic surfaces take longer to heat up. For best baking results, use an oven thermometer. DO NOT USE MICROWAVE OVEN. DO NOT EXCEED THE ABOVE TEMPERATURE OR RECOMMENDED BAKING TIME.
Take a length of aluminum foil and form a core for the mushroom body/stem in a long tapered cone shape about 2 inches long (or shorter or longer depending on the size of the mushroom you wish to make). Use aluminum foil to make a round slightly indented bowl shape for the mushroom cap. Make sure the foil is tightly compacted to prevent bubble issues later on. Set these forms aside for now.

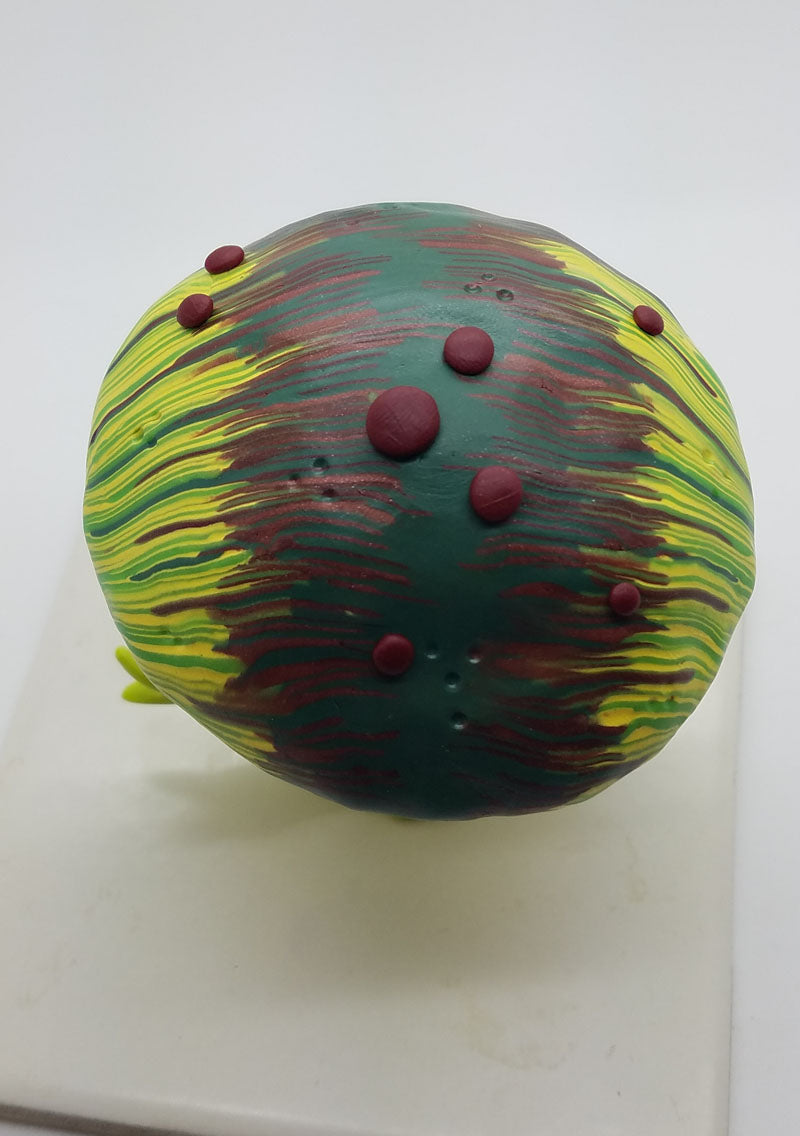
Create a random mixture of the Bright Green Pearl, Jungle, Canary, Bronze, Wasabi and a mix of Canary and Latte (mixed 1:1 to recreate Key Lime. Set aside a little of the Canary for the bottom of the cap). I did a fun mix, kind of a Skinner Blend, of these by conditioning strips of the clay, overlapping them, folding and combining.
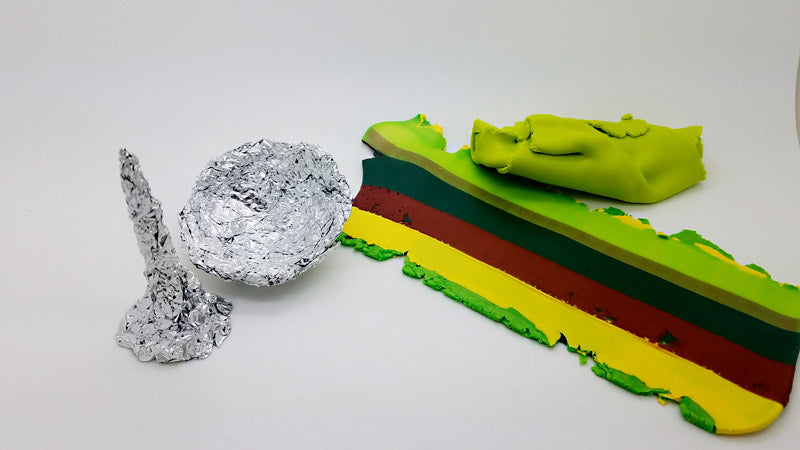
Once the colors are blended on the edges of each color, roll out into a sheet on your pasta machine. Cut ¼ inch strips (does not need to be exact). Stack the strips, alternating directions until you have a 2-3 inch stack. Lay on its side so you can see each layer, gently squeeze, squish and pull (also use your clay hand roller) to make a cool design for your mushroom cap. This will go on the top section of the foil cap—set aside for now.


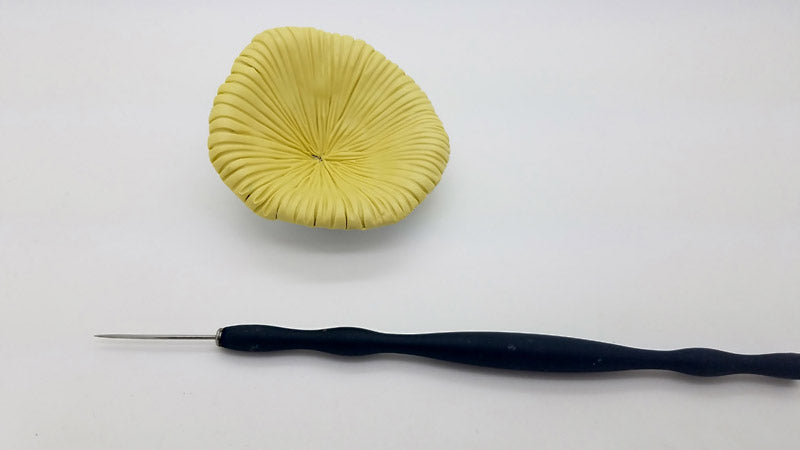
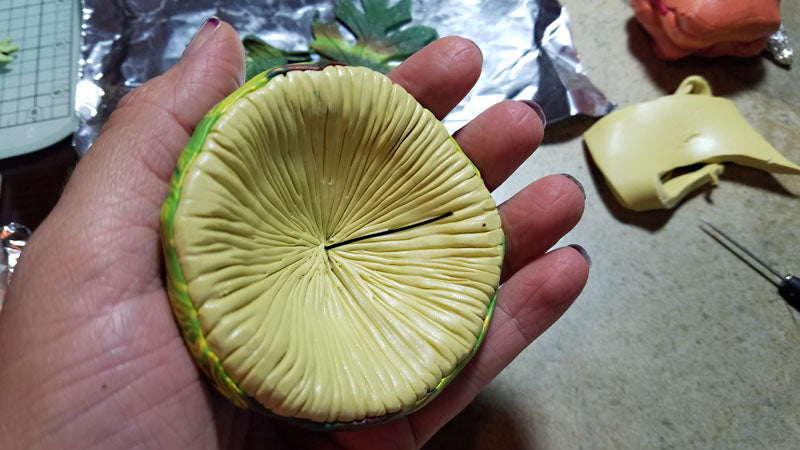
For the underside of the cap, mix half a block of the Pearl with some of the leftover Canary for a soft yellow. Blend and roll out to the thickest setting on your pasta machine. Cut & shape to the underside of the mushroom cap foil piece. Use the needle tool to create “spore” lines radiating out from the middle to the outer edges.
Once this is done, put the top color on the other side of the foil cap. Set aside


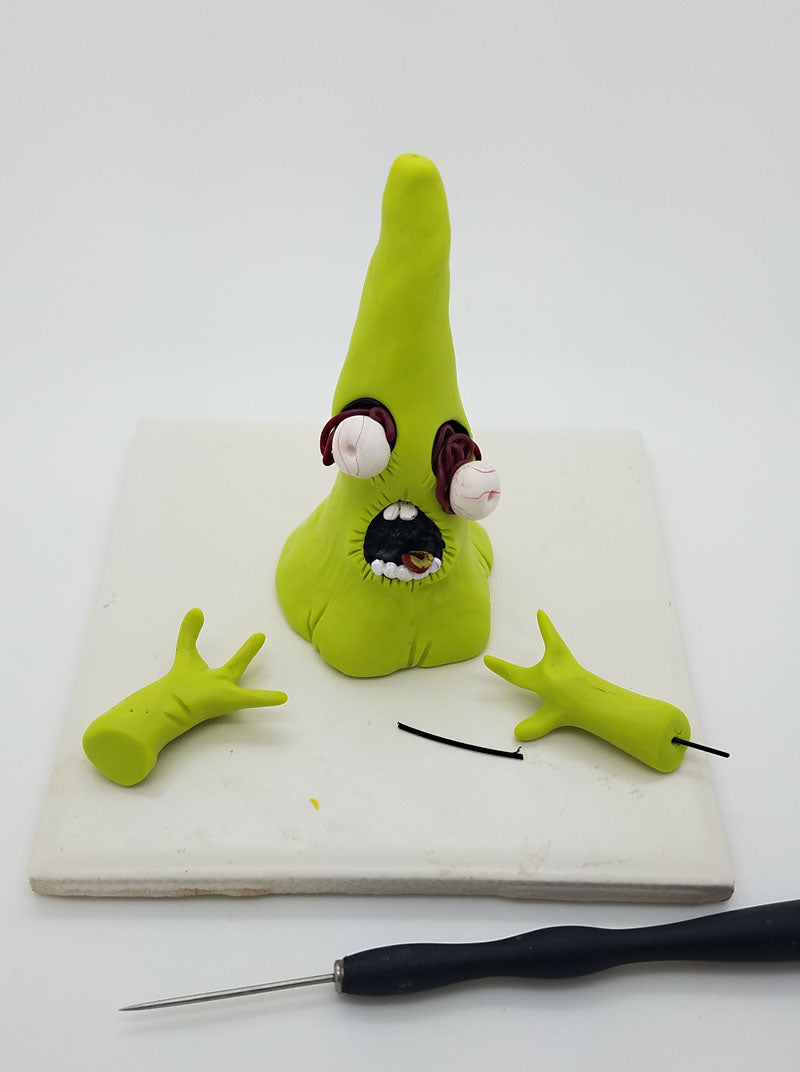
Condition and roll out the remaining Wasabi or other light color for the mushroom stem. Cover the foil core. Use the medium ball stylus tool to form holes for the eyes and mouth.

Use this tool to also press and spread out tiny pieces of conditioned black clay to fill in but leave rounded indentions for the mouth & eye holes. Use tiny bits of Alizarin Crimson blended and stretched into white clay to make bloodshot eyes.
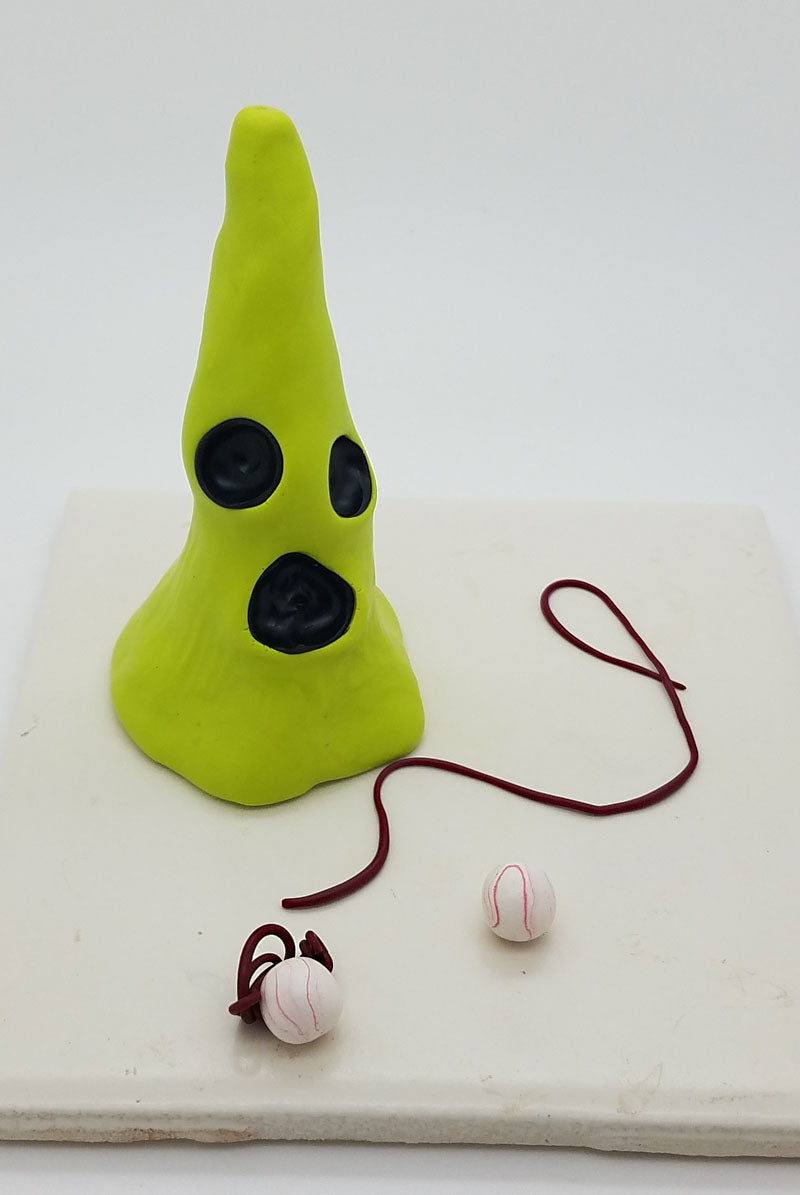
Make extremely thin ropes of the Alizarin Crimson for the eye blood vessels to wrap around the protruding eyes. Attach the eyes with vessels to the mushroom stem as desired. Use the smallest ball stylus tool to poke pupils in the eyes. You can make tiny white teeth and a red tongue if desired and insert into the mouth.

If you have leftover stem clay, you may want to make your mushroom even creepier by giving him some arms and hands to drag himself with. Be creative and position them in varying ways until you find what works for your creature. You will need to cut 2--½ inch or so pieces of 20 gauge craft wire to insert into the arms to connect to the body for added strength.

Use a 1 inch piece of 20 gauge craft wire to attach the mushroom stem to the cap. I made a hook at one end and pushed through the cap into the stem to catch on the foil cap core. Cover the resulting tiny hole on top of the cap with a “wart” of clay.
Accent your piece with the needle tool to make lines, cracks, hashtags, dots, etc. to give character.
Baked as directed above. After cooled, apply a patina of acrylic paint. I used a dark paint like Chocolate. A dark green would work too or black. Wipe off paint with barely dampened sponge. This will fill in any detail lines in the clay. Dry brush minute amounts of Neon Pink acrylic paints to features to give depth to the color of the sculpture. Apply Sculpey gloss to eyes and other features you wish to stand out. Now go creep someone out with your little fiendish shroom.
