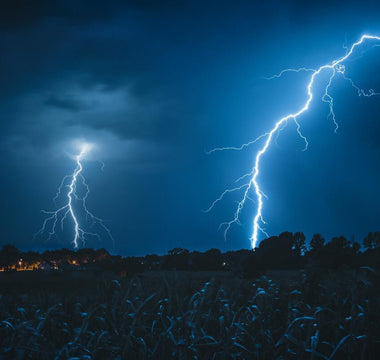


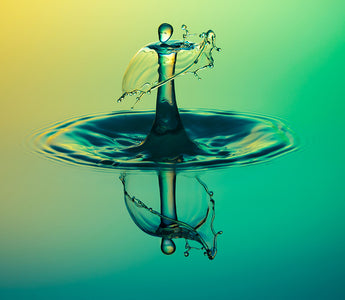
Water drop photography is a fascinating kind of photography. When a water drop collides with another water drop, it creates a mesmerizing shape, and capturing that is a very satisfying experience. The best thing about this photography is that it can be done in the comfort of your home, and thousands of different images can be created with a single setup. You need to make minor changes in water drop kit settings, lights, and background, and you will get an entirely different shot.

Equipment:
First, let's discuss the equipment you need for water drop photography. You can use any DSLR or mirrorless camera and a lens with a longer focal length. If your lens has macro capabilities, it would be great as you can capture the drop closely and don't need to crop it. A 100mm macro lens is the best option, but if you don't have one, you may use your existing lens.

You need two tripods, one to fix the camera and the other to hold the water drop setup. Then you will need at least two flashes for good lighting. If you have four, it would be great as you have more control over lighting. Other than these, you'll need some containers for holding the water, like a cup, glass bowl, or a glass tray. If you want to show the container in your picture, use a smaller container like a cup or glass or small bowl but if you're going to show only the dancing drop, use at least an 8inch x 12inch glass bowl or tray.

Next, you need some colorful backgrounds. You may download some abstract pictures from the internet and print them to use as background. If you don't want to do this, you can use a piece of colorful cloth or even a dress as a background.
You'll also need a room and a table to create the setup. Choose a free room to keep the setup for a few days and click different pictures. The last thing we need is something for water drops. Here you have a few options. First, you can fill a bottle with water, make a tiny hole, and hang it. It's the cheapest option, but you will have absolutely no control.
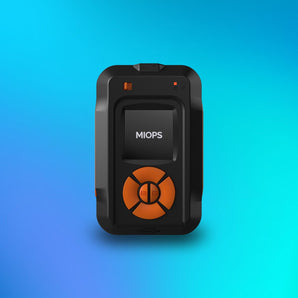
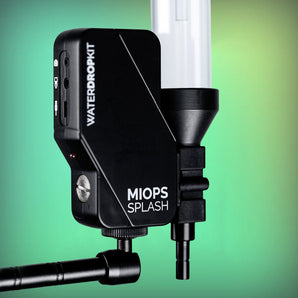
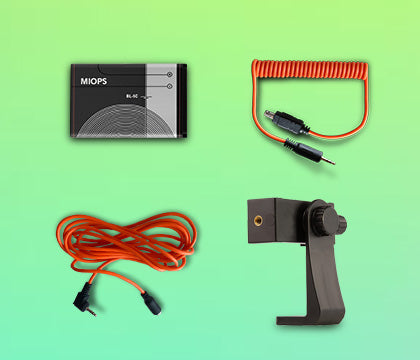
The second option is an IV set, and you can quickly get it from a medical shop. It'll give you control over the drop size, but again you'll have no control over the timing. Third and the best option is a water drop kit like MIOPS Splash. It's a combination of a water drop controller and a remote trigger. In simple terms, it not only controls the size of water drops, the timing of releasing the drops, time delay between the drops but also trigger the camera or flashes with split-seconds precision. With this remote trigger, you can click stunning shots with less effort.

Setup:
Now we have all the equipment, let's create the setup. I've created a setup image to make it easy for you.

You have to place the backdrop at the far end. You may hang it on the wall or use cello tape. Now place flashes on both sides at a 45-degree angle. Flashes will fire at the colorful background, and bounced light will illuminate the water drops. One flash will be connected to the camera or remote trigger, and the other will work on slave mode and fire automatically when the first one is fired. Don't forget to cover the flashes with a plastic sheet.
Now place a glass bowl at the center of both flashes. It should be around 12-18 inches away from the background. Place the MIOPS water drop kit on a tripod directly above the glass bowl so the water drop will fall at the center of the bowl. Attach it with the first flash using the provided cable. If you are using an IV set, place it accordingly.
And lastly, place the camera on another tripod. It should be slightly up from the glass bowl (around 15-20 degrees downward). The distance between the water bowl and the camera depends on your lens.

Settings:
Let's talk about the camera, flashes, and trigger settings. Set both flashes to 1/64 power setting. You need to set flashes on low power mode so that you get a shorter light burst and don't have motion blur in your pictures. We'll fire the flashes using a remote trigger, so we don't miss the shot because of the camera's shutter lag.
Now set the camera on bulb mode and set the ISO to 100. We need the entire splash in focus, so set the aperture to f/16 or f/18. After that, place a pencil at the center of the bowl, focus on it and switch your camera to manual focus mode.

Camera settings are done, so let's set up the MIOPS Splash. Set first drop size to 25 milliseconds, second drop size to 50 milliseconds, and delay to 100 milliseconds. Lastly, set trigger delay to 350 milliseconds and mode to flash.
These settings are just for an idea or a starting point. You need to make tiny changes according to the setup. These settings are good if you have 2 feet distance between the nozzle of the trigger and the water container. If MIOPS Splash is higher or lower, change the second drop delay time and trigger delay accordingly.
Workflow:
You are ready to take some excellent dancing water shots. Take a test shot to check the lighting. If the light is bright, set flashes to 1/128 power. If the light is not enough, set flash power to 1/32. Never go below 1/32. Increase the ISO to 200 or more if the light is still insufficient.
When you activate the trigger, it'll release the first drop and then the second drop, which will collide with the column created by the first drop. As soon as it happens, it'll trigger the flash, and you'll have a beautiful shot. All you need to do now is open the camera's shutter and activate the trigger. Don't forget to dim the room light so it won't affect the shot.
 Photographer: Mohamed Labib
Now you can experiment with different settings to get various shots. Changing the size of the second drop will give you different shapes, and changing the trigger delay time will also give you different results. Make sure you change only one setting at a time and make minor changes (2-3 milliseconds). This small change is enough to get different results.
You can also experiment with water by adding milk or color to it. Milk will change water density and make it opaque, so it'll start looking different. Experiment with background, and use bright and pastel colors to get different results. Options are endless, and you can click thousands of different photographs with this setup by making small changes.
So, let's start creating magnificent dancing water drop pictures and share them with the world.
About the Author
Ramakant Sharda is an author, iOS App publisher, passionate photographer and a MIOPS Ambassador based in the beautiful “Pink City” of India, known as Jaipur. His work has been published in various magazines, newspapers, and blogs. He has published three Coffee Table Books, he writes about photography and also teaches photography in his workshops. Check out his website http://ClickManic.com to see the masterpieces created by him or download his free app for iPhone and iPad “30 Days to an Ace Photographer“.