Seated yoga poses are a fascinating part of yoga asana practice. They can be a great starting point for beginners, while still providing more experienced practitioners with a challenge. However, more than that, sitting yoga asanas offer a safe path to increased flexibility.
One of yoga’s most popular benefits is flexibility. Most people think they need to stretch their hamstrings to become more flexible, and they might be right. But the hips need to move in more than one direction, and other body parts need equal attention. A stiff upper back, for example, is a common cause of aches and pains — it could even be the source of your neck pain or migraines.
Your joints and muscles need your help to stay healthy, mobile, and strong. If you struggle with mobility issues or simply want to enhance your practice, these easy seated yoga poses for flexibility offer ample benefits for the body and mind!
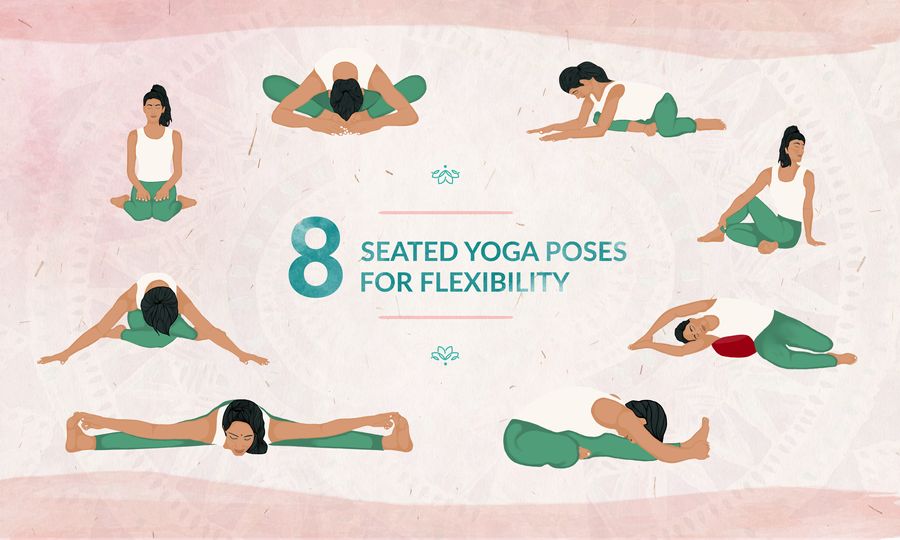
In this simple floor sequence, you will be introduced to various sitting yoga poses, from the soothing Yoga Deer Pose to forward folds like Shoelace and Butterfly Pose. As you practice each asana, remember to find the position that creates a comfortable degree of stretch. Breathe evenly and allow your body to relax into the pose with each exhalation.
Easy Seated Yoga Poses for Full Body Flexibility
Seated yoga poses, whether in a chair or on the floor, are ideal for seniors or beginners who are gradually improving their flexibility in class. They are gentle on the knees, providing a nourishing stretch that can offer relief for lower back pain or tight hips. Additionally, these sitting down yoga poses target both the upper and lower body, offering multiple benefits during your time on the yoga mat.
1. Half Spinal Twist (Ardha Matsyendrasana)

The Half Spinal Twist encourages range of movement in the hips and shoulders, as well as along the full length of the spine. The rotation element helps to free the chest area, which can improve respiration.
How to Practice Half Spinal Twist
- To come into this sitting yoga pose, start on the mat with your legs stretched out in front of you.
- Bend your right leg, tucking the heel up to your left hip.
- Lift your left foot over your right knee and place it on the floor. Keep both sit bones even on the floor.
- Turn your upper body and place your left hand to the floor (or on a block) behind your spine.
- Reach up with your right hand, then bring your right elbow to the outside of your left knee. If flexibility allows, you can reach further to hold your left ankle with your right hand.
- Twist gently toward your left, looking over your shoulder.
- To come out of the pose, slowly turn back, release your arms, and unwind your legs. Don’t forget to do the other side.
Modifications & Cautions
- To keep your lower back safe, stay relatively straight and focus on creating the twist in the upper (thoracic) spine.
- Straightening the leg underneath can help keep the sit bones evenly weighted on the floor.
- Be cautious with this seated yoga pose if you have abdominal, spinal, or sacroiliac joint issues.
2. Rainbow Pose

Rainbow Pose is a gentle sitting yoga pose that lengthens the muscles in the lower back and side body, while also opening the front of the hip on the upper side. Find a bolster or a nice thick cushion, and take the time to practice this pose on both sides. Practitioners looking to further explore the benefits of inversions can find additional guidance on how to practice yoga inversions.
How to Practice Rainbow Pose
- Place a cushion by your right side and sit with the soles of your feet together in front of you (Butterfly).
- Lift your left leg and flip it over so your left foot points out behind you.
- Raise your left arm up and bend your torso to the right. Lie down onto your side, with the cushion supporting your waist.
- Rest with your arms long, framing your head, palms together.
Modifications & Cautions
- Choose a cushion sized to suit you.
- Shift the lower arm forward to reduce shoulder strain. Place a folded towel under the head if needed to replace the arm.
- Be cautious with this pose if you have pelvic instability, lower back issues, or untreated hypertension (high blood pressure).
3. Deer Pose

This sitting pose in yoga resembles a resting deer and features a similar leg position as Rainbow Pose. However, instead of folding to the side, the Yoga Deer Pose sees the upper body fold forward toward the shin, creating a gentle stretch. When we practice this seated asana, we repeat the movement on both sides for balanced flexibility. For individuals with hypermobility, understanding yoga for hypermobility safety guidelines can be crucial to a safe practice.
How to Practice Deer Pose
- Sit with the soles of your feet together in front of you (Butterfly Pose). Lift the left leg and swing it to the back, so that your foot is past your hip and pointing to the back.
- Adjust your feet close enough to your body to let your sit bones meet the floor evenly.
- Gently fold your upper body forward, toward the right shin.
- Reach out with the top of the head, lengthening the spine.
Modifications & Cautions
- Use a block under the supporting hand to keep the spine long.
- Sit on a cushion or folded blanket to reduce hip rotation strain.
- Be cautious of Deer Yoga Pose if you have hip, knee, or lower back issues.
")
Get a free copy of our Amazon bestselling book directly into your inbox!
Learn how to practice, modify and sequence 250+ yoga postures according to ancient Hatha Yoga principles.
Easy Seated Yoga Poses for Lower Body Flexibility
If you struggle to touch your toes or fold forward effortlessly in yoga, then you’re most likely lacking flexibility in your lower body. Standing yoga poses like the Warrior Poses can improve mobility in your hips, hamstrings, and lower back, but for beginners or practitioners with previous injuries, taking it to the floor with a few simple sitting down yoga poses is a safe and effective option.
While these seated yoga poses naturally incorporate the entire body, your legs, hips, and lower back will be challenged the most. You can perform these poses as one fluid floor yoga flow to release tension in the lower body, or even as individual asanas to push your flexibility further.
4. Head-to-Knee Pose (Janu Shirshasana)

Head-to-Knee Pose works on hip joint range, and particularly on hamstring length. Stretching one side at a time is useful when working the hip joint, because your hip joint bones can be a different shape on one side compared to the other. If one hip is always ‘tighter’ than the other, the reason could be your bones rather than your muscles. Stretch gently, avoid pain, and listen to your body.
How to Practice Head-to-Knee Pose
- Sit with your legs stretched out in front of you.
- Bend your right leg and place your right foot against your left inner thigh.
- Breathe in, reach your hands up to the ceiling, and lengthen your spine.
- Breathe out, bend forward, and catch hold of your left foot.
- As you breathe in, lengthen the front of your torso and gently reach with your lower belly toward your left thigh.
- Hold the pose for as long as is comfortable, breathing evenly.
- Repeat with the opposite leg bent.
Modifications & Cautions
- Make sure to start this seated yoga pose on your mat with most of your weight on your sitting bones. If your lower back is rounding, bend your knees a little.
- Always initiate the forward fold from the hip joint, folding forward with a long spine at first. If you feel discomfort in the knee, or if you have pelvic instability, support the fully bent knee with a block, cushion, or folded blanket.
- Be cautious with this pose if you have abdominal, spinal, or knee issues.
5. Shoelace Pose (Adho Mukha Gomukhasana)

Shoelace Pose focuses on hip rotation, lengthening many muscles around the hip joint. Be sure to practice this seated yoga pose on both sides and remember that your bone structure can determine your limits.
How to Practice Shoelace Pose
- Sit on your heels, with your knees together.
- Shift your weight to your left, to sit on your left hip.
- Flip your right (top) leg over, so your right knee is on top of your left knee, and your right heel is near your left hip.
- Breathe in, push both your sitting bones into the floor or cushion, and elongate your spine.
- Breathe out and fold your torso forward.
- Rest your hands on the floor and your forehead on your knee or the floor in front of you.
Modifications & Cautions
- If coming into the pose as described above creates strain in the knees, and/or you’re unable to sit tall, you can:
- support your hips with a folded blanket or a block, or
- straighten the lower leg out in front.
- Be cautious with this pose if you have abdominal, spinal, or knee issues.
6. Butterfly Pose (Baddha Konasana)

Butterfly Pose, sometimes called Bound Angle Pose, is a seated yoga pose often practiced in Yin, Vinyasa and Hatha Yoga to free up hip mobility. Apart from increasing hip mobility, Butterfly Pose can also relieve stress, reduce chronic pelvic and back pain, boost energy, and promote mindfulness, among other benefits.
How to Practice Butterfly Pose
- Sit with your legs in front of you.
- Bend your knees and bring the soles of your feet together.
- Draw your feet as close to your pelvis as possible, while sitting upright with your weight on your sitting bones (if you feel any pain or pressure in the knees, see modifications below).
- Hold your feet, breathe in, and lengthen up through the crown of your head.
- Breathe out and bend forward with a straight back. Once bent forward, you can relax your back and, if possible, rest your forehead on your hands or on the floor.
- Hold the pose as long as you are comfortable, breathing evenly.
Modifications & Cautions
- Sit on a bolster, thick cushion, or folded blanket if you struggle to sit upright.
- Place a yoga block under each knee in case of discomfort, supporting your thighs an inch or so above their maximum stretch.
- Be cautious with this pose if you have abdominal, spinal, knee, or groin issues. Never force your knees down to the floor.
7. Dragonfly Pose (Upavistha Konasana)

Like with any asana that requires flexibility, Dragonfly Pose won’t look the same for everyone. Respect your body by moving into this gentle sitting down yoga stretch without trying to force the position. You might feel a pull in the groin, hamstrings, or the small muscles of the hips and lower back.
When practicing Dragon Pose in Yin Yoga, you’ll hold this pose for several minutes to lengthen the connective tissues in the legs and release tight muscles. This can have a significant impact on your overall health and performance in yoga, increasing hip mobility and stimulating the ovaries.
How to Practice Dragonfly Pose
- Sit with your legs straight in front of you.
- Lean back on your hands and widen your legs to an angle of about 90 degrees, or as wide as you feel comfortable.
- Place your hands to the floor in front of you and shift your buttocks forward to widen your legs, if possible. Press out through the heels of your feet and keep your knees pointed toward the ceiling.
- Hinging from your pelvis, walk your hands forward between your legs.
- If possible, catch hold of your big toes or the outside of your feet and lower your chest and chin to the floor.
- Hold the pose as long as you can comfortably, breathing evenly.
Modifications & Cautions
- You can make this pose more accessible and safer by:
- sitting on a folded blanket,
- allowing your knees to bend as much as suits you, placing the soles of the feet on the floor, or
- using your palms or Forearm to support your upper body instead of grasping your toes.
- Be cautious with this pose if you have spinal, groin, or hamstring issues.
8. Hero Pose (Virasana)

Hero Pose builds flexibility in the hip joint (internal rotation), quadriceps, and ankles. It’s important to support this seated yoga pose so that your knees don't take on unnecessary strain. Begin with a higher seat support than you think you need and notice how it feels in your body as you hold the pose over several slow breaths.
How to Practice Hero Pose
- Sit on your heels on the floor, with your inner knees together.
- Slide your feet apart, slightly wider than your hips, keeping the tops of your feet flat on the floor. Check whether you can comfortably lower your buttocks toward the floor between your heels. If not, place a cushion or bolster under your sit bones for support.
- Place your hands palms down on your thighs.
- Sit tall, lengthening your spine.
- Relax your shoulders and your face. Breathe consciously.
Read More - Virasana Pose: How to Safely Practice Hero Pose
Modifications & Cautions
- A block or cushion between the feet to support both sit bones evenly will take pressure off the knees.
- Allowing the knees to rest a little wider apart may be more comfortable.
- Be cautious with the pose if you have knee or ankle issues. Always use sufficient support under the sit bones to avoid feeling any strain in the knees.
Get a free copy of our Amazon bestselling book directly into your inbox!
Learn how to practice, modify and sequence 250+ yoga postures according to ancient Hatha Yoga principles.
A Note on Safety
Whether you’re a senior, beginner, or advanced yogi, practicing these easy seated yoga poses as a soothing sequence in the morning or before bed is an effective way to improve your flexibility in yoga and relieve pain safely. Stretches and flexibility work should never cause pain during or after the activity. It’s vital that you listen to your body and ease off or bring in support when necessary.