DSL ISP's usually provide the user with a basic DSL router to allow their computer to access the Internet. If the user wants better router features, such as the advanced wireless, security or storage features provided by some NETGEAR routers, they may buy a new router with a built-in DSL modem, which will completely replace the router supplied by the ISP, or alternatively they can buy a cable router and connect it to the ISP-supplied router, which has been put into "modem" or "bridge" mode. This latter option is the setup discussed in this article.
NOTE: Before proceeding with the setup steps, make sure that the router in modem or bridge mode is working correctly by connecting a computer to one of it's LAN ports checking that the computer can access the Internet when correctly configured: Creating a PPPoE Dial Up Connection on Windows 7
- Connect the DSL modem to the Internet port / WAN port of the router and the computer to any of the available ports at the back of the router.
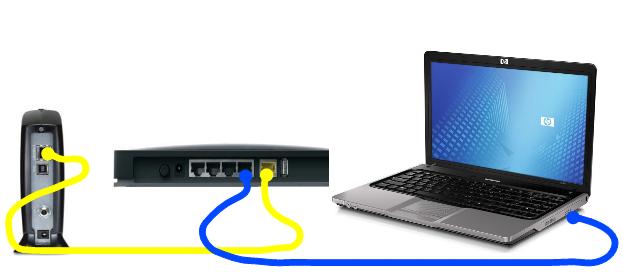
- After connecting the devices together, check the lights on the front panel of the router. Make sure that the ports where the Ethernet cable are connected to are lit.
- Access the console of the router using the default IP or using the www.routerlogin.net / www.routerlogin.com.
- Under the Basic Tab, click on the Internet.
- Select Yes for the “Does your internet connection requires a login?”
- Click the drop-down arrow under the Internet Service Provider and select PPPoE.
- Enter the Username and Password given by your ISP and click Apply.
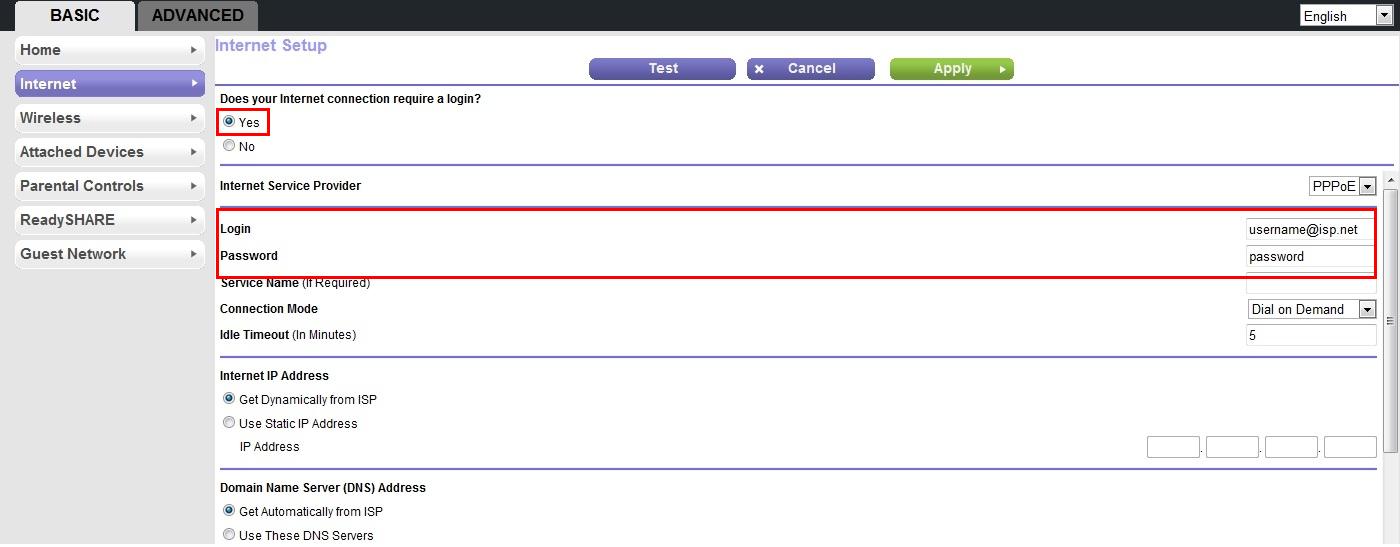
- For the Connection Mode setting: by selecting Dial on Demand option, connection automatically starts when there is outbound traffic to the Internet and it automatically terminates if the connection is idle based on the value in the Idle Timeout setting.
- By selecting Always On option, the connection automatically starts when the computer boots up but the connection does not time out. The router will keep trying to bring up the connection if it is disconnected for some reason.
- By selecting Manually Connect option, you must go to the Router Status screen and click the Connect button in order to connect to the Internet. The manual connection does not time out and you have to click the Disconnect button on the Router Status screen to disconnect it.
- To check the Internet IP address, click the Advanced Tab > Administration > Router Status.
- If the IP Address shows a public IP address, not 0.0.0.0, it is connected to the Internet.

- If the Internet IP Address are showing 0.0.0.0, click on Connection Status > Connect.
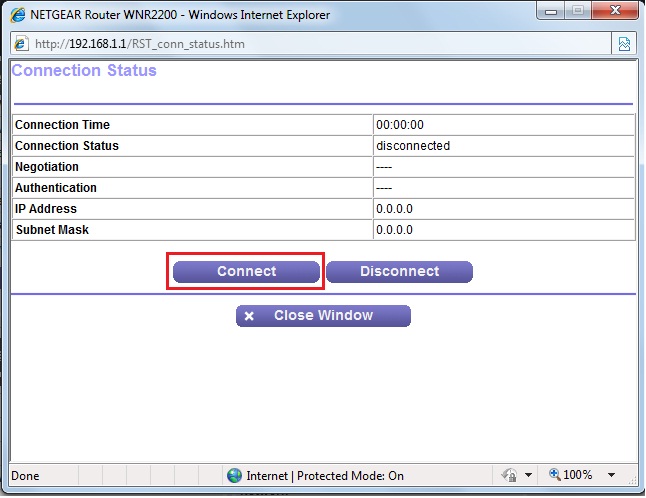 You should have numbers on the IP address and internet should be working.
For more information about PoE, see the NETGEAR PoE Ethernet page.
Last Updated:03/10/2023
|
Article ID: 20305