


Every record in Copper has a unique ID number. It’s quite common to use this Copper ID number across different platforms. For example, you might take an Opportunity’s ID number and reference it on an invoice.
This quick guide will show you how to populate the Copper ID into a custom field so that you can quickly grab it for use elsewhere or maybe include it in your reports!
This guide has all the details you need to set this up. If you prefer a more general guide on Workflow Automation, click here!
Note: Workflow Automation is available to admins on our Professional and Business plans.
Step 1: create a Custom Field to store the ID number
You’ll need a Custom Field to store the ID number. To do this:
- Go to Settings > Customize > Manage Fields on Records. Select the record type you want the ID for - People, Companies, Opportunities, Projects, etc.
- Click the Create Field button. For Type, select Text Field. For Label, enter the name for the field, such as “Project ID” or “Opportunity ID.” You can ignore Field Key; we won’t be using it here.
- Click Create Field.
- Optionally, rearrange the order of your fields for easier use.
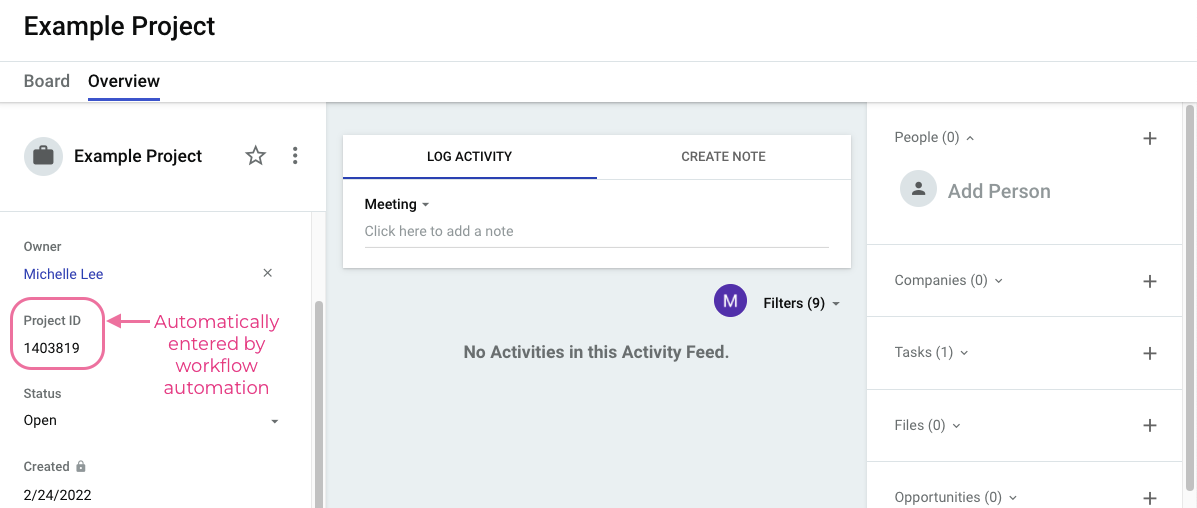
The end result will look something like this:
Of course, we only created the field to store the ID - we still need to get the system to populate it for us!
Step 2: set up the Workflow Automation rule
Go to Settings > Automate > Workflow Automation > Add Workflow. There, you’ll see three boxes:
- Name, for the name of the Workflow Automation Rule. Enter something that describes what it will do, like “Populate Project ID field”
- Trigger, which indicates when the automation will happen.
- Action, which indicates what the automation does.
In effect, we are telling the system: whenever a Project is created (trigger), populate the ID number (action).
So, this is what your Trigger will look like:
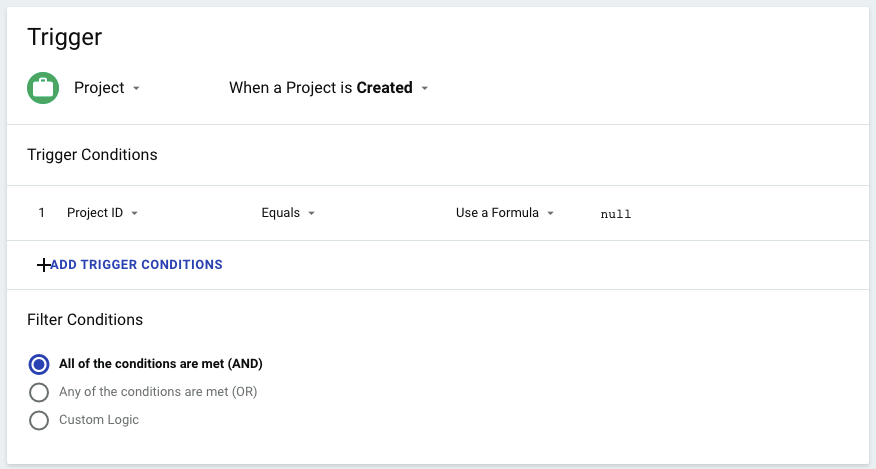
Pay attention to these settings in the Trigger:
- Project / record type: In this example, we’re using Projects. But if you’re populating an Opportunity ID, make sure you select Opportunity in the top left corner.
- When a Project/Opportunity/etc is Created: this tells the system to check this automation each time that record type is created, as opposed to updated.
- Trigger Condition: Project ID - Equals - [Use a Formula] -
null. Project ID refers to the custom field we created. [Use a Formula] -nulltells the system to check if that field is empty before proceeding.
And onto the Action:

Once you’ve configured your Workflow Automation Rule, save it and remember to turn it on before moving to the next step.
Step 3: test it out!
With all Workflow Automation Rules, we recommend testing it out. For this one, that’s as simple as creating a new Project/Opportunity and then refreshing the page to see if the ID has populated.
Need more help?
If you’re having trouble with your Workflow Automation or just want more help, we’re here for you! You can:
- Post in our Community Forum - we’ll help you out! Just remember to explain what you are trying to achieve and, if possible, post a screenshot of your Trigger, Action, or error message (if applicable).
- Join our weekly webinar - we’ll answer your Copper questions live!